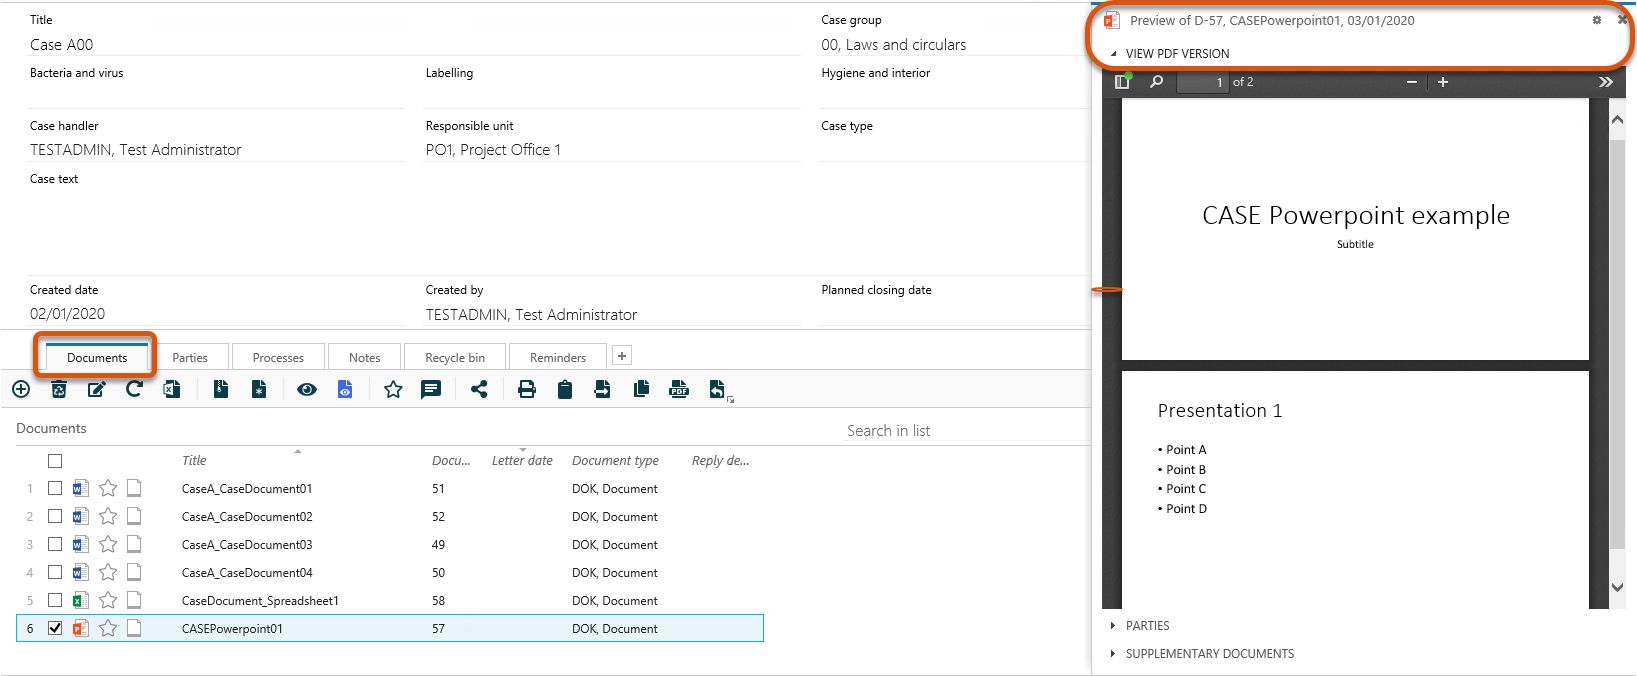
The Preview Pane
When a case, a document or a contact is displayed on a list, you can quickly see part of the content and references in a preview pane. The preview pane contains different information depending on whether you open a case, a document or a contact.
The preview pane provides a preview of an item on a list. When you have selected, for example, a case in a list and clicked  Preview , the case is displayed in the preview pane. You can also press P to toggle between opening and closing the preview pane for the selected item.
The following display options are available for the preview pane:
|
For Cases |
For Documents |
For Contacts |
|---|---|---|
|
Documents* |
View PDF version* |
Addresses* |
|
Parties* |
Parties* |
Contact references* |
|
Case text* |
Supplementary documents* |
Case references* |
|
Case references |
Information |
Documents* |
|
Dates |
Document references |
Dates |
|
Information |
Office Online |
Information |
|
Reminders |
Dates |
|
|
Case references |
* Default information.
When using the Microsoft Edge web browser and the PDF preview pane is expanded to the maximized mode, the preview pane will not be rendered correctly. Scrolling the preview pane in the maximized mode is also not possible.
You can customize the preview pane for the list item, adding and removing display options as well as changing the order they are displayed.
The View editable PDF version pane
The View editable PDF version pane will only be displayed in the Available panes of the preview pane if the advanced PDF viewer has been enabled by a system administrator in WorkZone Configurator.
You can make the advanced PDF viewer the default PDF viewer on the preview pane by placing the View editable PDF version pane before the View PDF version pane.
The advanced PDF viewer is an experimental feature that enables you to edit PDF documents directly. When you save your changes to the document, the document will be stamped with a PDFTron viewer watermark.
- Open a list, for example My open cases.
- In the list area, select a case and click
 Preview on the ribbon to display the case in the preview pane.
 - In the top right-hand corner of the preview pane, click
 Configure preview to open a display of available and applied panes. Panes that can be added to the preview pane are displayed in the Available panes (left pane) and applied panes are displayed on the right pane.
 - To add a new pane, select and drag a pane from the Available pane to the right pane or select the pane in the Available pane and click
Select item.
- To remove an applied pane, select and drag the pane from the right pane to the Available panes or select the pane you want to remove in the right pane and click
Deselect item.
- Click Apply to save your customized preview pane.
You can reset the preview pane, clearing all customizations and restoring the default preview pane. Only the active preview pane is reset, not all preview panes in your configuration.
- Open a list, for example My open cases.
- In the list area, select a case and click
 Preview on the ribbon to display the case in the preview pane.
 - In the top right-hand corner of the preview pane, click
 Configure preview to open a display of available and applied panes.
 - In the Available panes area, click Reset to open the Confirm dialog.
- In the Confirm dialog, click Yes to restore the preview pane to the default, removing all customizations.
A blue line above a detail tab indicates which object is currently displayed in the preview pane. The line only appears on the detail pages. It is not displayed on the Home tab.
If you need to preview another object, open the relevant detail tab, select the desired item, and click  Preview.

