Dispatch sequences
To view and configure dispatch sequences, you must have the PROCESSADM access code.
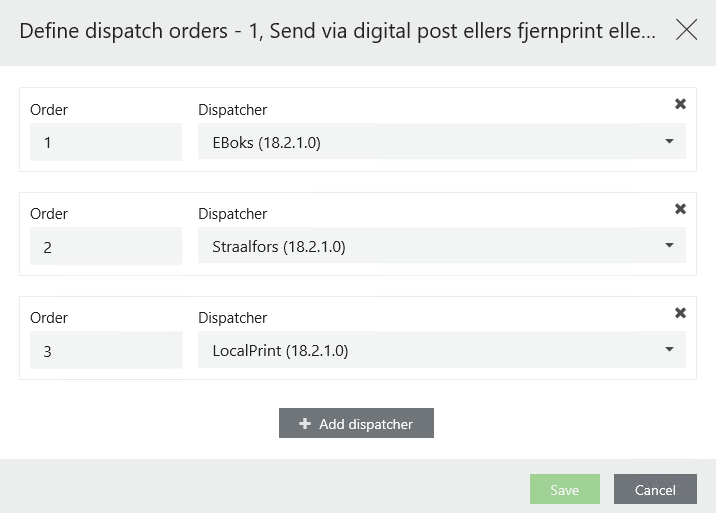
A dispatch sequence is a prioritized set of dispatchers that the SmartPost user can select in the Send SmartPost dialog box. For example, a user may select a sequence named Send by digital mail or else remote print else local print. In this case, SmartPost tries to use e-Boks as the dispatcher to reach the recipient of a message. If the sending fails, SmartPost uses Strålfors instead, and finally if this sending also fails, SmartPost sends the message to local print.
The SmartPost package is configured with 4 standard dispatch sequences:
- Send by digital mail or else remote print or else local print
- Send by remote print or else local print
- Send by local print
- Send by digital mail or else local print
In WorkZone Configurator, you can configure standard and custom dispatch sequences and define which sequence to display to users.
See also Configure dispatch sequences in the Administrator Guide for WorkZone Process.
Important: Be aware that you cannot delete a dispatch sequence. However, you can deactivate a dispatch sequence by setting the start date to a future date or end date to a past date.
- On the main page, select Process.
- On the Dispatch sequences tab, in the bottom right corner of the page, click
Create.
-
Fill in the following fields in the Create dispatch sequence dialog box:
- Name – Name of the dispatch sequence that is visible to users.
- Order – The order in which the dispatch sequences will be shown to users in the Send SmartPost dialog box. Enter a number.
- Access code – Click
 and select units and users who should be able to see and use the dispatch sequence.
 - Start date – The date when the dispatch sequence becomes active. Before the start date, the dispatch sequence is invisible in the user interface.
- End date – The date when the dispatch sequence is deactivated. After the end date, the dispatch sequence becomes invisible in the user interface.
- Click Create.
- Point to the dispatch sequence that you want to update. A menu bar with action buttons appears.
- Click
Edit.
- Apply the required changes in the Edit dispatch sequence dialog box.
- Click Save.
Note: You cannot edit the Name value.
Use this functionality to define a custom set of dispatchers and their order.

- Point to the dispatch sequence where you want to define the dispatchers. A menu bar appears.
- Click
Define dispatch sequence.
- In the Define dispatch sequence dialog box, apply the required configuration:
- To add a new dispatcher, click + Add dispatcher. Select a dispatcher from the Dispatcher list and define its place in the sequence.
- To remove the existing dispatcher, click
 Remove.
 - Click Save.
