Configure dispatch sequences
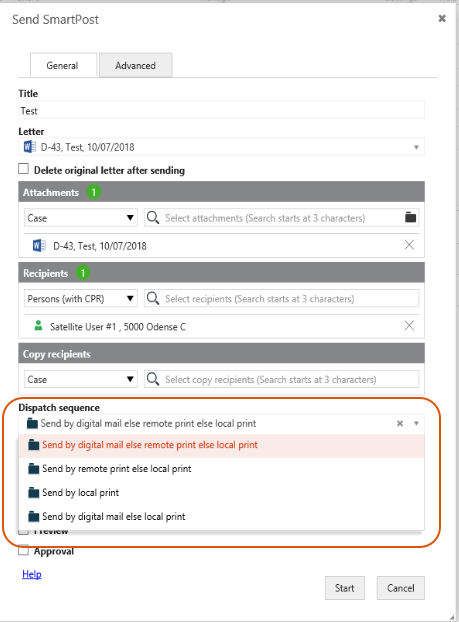
A dispatch sequence is a prioritized set of dispatchers that the SmartPost user can select in the Send SmartPost dialog box. For example, a user may select a sequence named Send by digital mail or else remote print else local print. In this case, SmartPost tries to use e-Boks as the dispatcher to reach the recipient of a message. If the sending fails, SmartPost uses Strålfors instead, and finally if this sending also fails, SmartPost sends the message to the user for printing locally.
You can configure several dispatch sequences and define which sequence to display as the default dispatch sequence in the Send SmartPost dialog box.
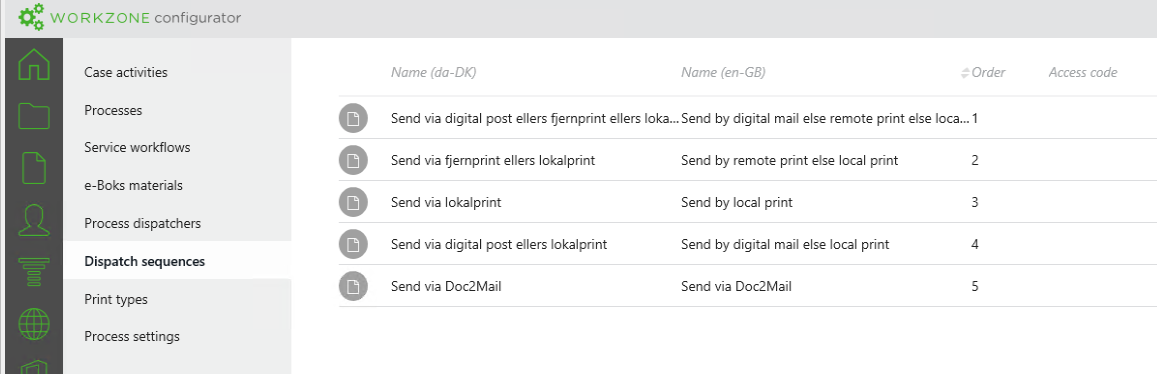
Dispatch sequences in the SmartPost package
SmartPost is delivered with the 5 dispatch sequences shown below. The dispatch sequences are ordered according to the values in the Order column, and they display in this order in the Send SmartPost dialog box. You can use the dispatch sequences as is, modify the naming and order, or create new sequences that include dispatchers that match your organization.
Digital mail
When the e-Boks dispatcher is used, SmartPost sends the message to the recipient through e-Boks if the following criteria are met:
- SmartPost must have access to the recipient's CPR or CVR number.
- SmartPost verifies that the recipient subscribes to a registration group that matches the selected logical registration group. SmartPost also verifies that the registration group matches the recipient type, that is citizens or companies.
- The size of the message does not exceed the limit defined by e-Boks.
If the sending fails, SmartPost will try to send the message using the next dispatcher specified in the dispatch sequence, through Strålfors or OneTooX.
Remote print
When the Strålfors or OneTooX dispatcher is used, SmartPost sends the message to the recipient if the following criteria are met:
- The recipient has a valid postal address:
- Name of the recipient.
- At least one address line.
- A postal code.
- The size of the message does not exceed the limit defined by the dispatcher.
If the sending fails, SmartPost will try to send the message by using the next dispatcher specified in the dispatch sequence, for example local print.
Local print
When the local print dispatcher is used, SmartPost generates an email with the message as an attachment. The email will be sent to the user, who started the SmartPost process. It is then up to the user to print the message and handle the dispatch manually.
Create or modify dispatch sequences
You create and configure dispatch sequences in WorkZone Configurator. The dispatch sequences that you create will be available to user in the Dispatch sequence field in the Send SmartPost dialog box.
You can use the dispatch sequences as they are, modify the naming and order, or create new sequences that match your organization. To create a new dispatch sequence, you must first create the dispatch sequence, and then add dispatchers to it.
- In WorkZone Configurator, click Process
- Click Dispatch sequences.
- Point to
 next to the dispatch sequence that you want to use, for example, Send by digital mail else remote print else local print, and click
  Edit. Change the values so that they match your organization, for example, change the names you want to display to the users in the Localize name fields and the order in the Order field.
 - Fill in other parameters that are relevant for your organization. See Create a dispatch sequence in the WorkZone Configurator Administrator Guide for a description of each parameter.
- Click Save to save changes you made to existing sequences or Create to create a new sequence.
- Or -
Click  to create a new dispatch sequence, enter a name for the sequence in the Name field and a number in the Order field. The dispatch sequence will be displayed according to this number in the Dispatch sequence field in the Send SmartPost dialog box.
If you created a new dispatch sequence, the next step is to add dispatchers and define the order of the dispatchers in the sequence.
Add dispatchers to a dispatch sequence
- In WorkZone Configurator, click Process > Dispatch sequences.
- Point to the dispatch sequence to which you want to add dispatchers, and click
 Define dispatch sequence.
 - Click Add dispatcher, select the dispatcher you want to add to the sequence, and specify its order in the dispatch sequence.
Remove a dispatcher from a sequence
- Click
 to remove a dispatcher from the dispatch sequence.
Set up a default dispatch sequence
You can specify a default dispatch sequence, which will be preselected in the Send SmartPost dialog box.
- In WorkZone Configurator Click Process.
- Click Processes.
- Point to next to the SmartPost process, and click
 Edit process parameters.
 - In the DefaultDispatcherSequenceId field, select the dispatch sequence that you want to be preselected in the Send SmartPost dialog box.