Configure dispatchers
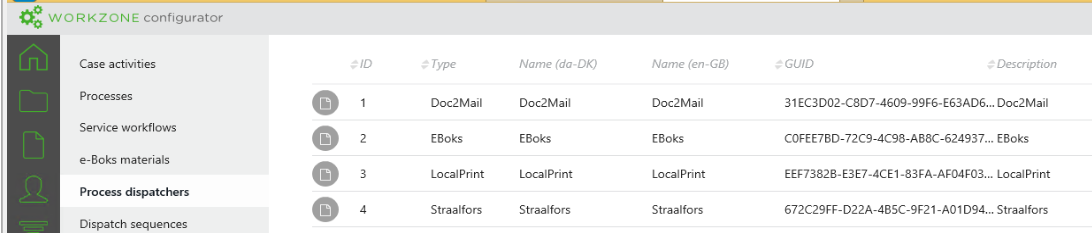
You can configure a number of dispatchers to handle different ways of sending messages. SmartPost is delivered with 4 default dispatchers.
You can modify the default dispatchers to match your organization's needs or you can create new dispatchers.
You can create dispatchers of the following types:
- e-Boks - The message is sent to the recipient's digital mailbox in e-Boks.
- Strålfors - The message is sent to Strålfors that handles the printing, enveloping, and handover to PostNord.
- OneTooX – The message is sent to KMD Print Center that handles the printing, enveloping, and handover to PostNord.
- Local print - The WorkZone user receives a smarttask that includes the SmartPost messages in PDF format. The user handles printing, enveloping, and sending of the messages manually.
Configure dispatchers
You create and configure dispatchers in WorkZone Configurator.
- In WorkZone Configurator, click Process
- Click Process dispatchers.
- Point to next to the dispatcher you want to use, for example e-Boks, and click
 Edit. Change the values so that they match your organization, such as the name and description of the dispatcher, start and end date, and access rights. See Process Dispatchers in the WorkZone ConfiguratorAdministrator Guide for a description of the dispatcher settings.
- Or -
Click  to create a new dispatcher. In the Select dispatcher dialog box, select the type of dispatcher you want to create.
The dispatcher version number, which is displayed next to the dispatcher type, corresponds to the WorkZone Process release that you are running. When you upgrade WorkZone Process, a new version of the dispatcher is created with a version number that corresponds to the new release, and the previous dispatcher version automatically gets an end date. Ongoing SmartPost processes will continue to run using the previous version, and new SmartPost processes will use the new version of the dispatcher. On the Process dispatcher tab in WorkZone Configurator, all dispatcher versions are listed.
It is not recommended to make changes to old dispatchers nor remove the end dates of old dispatchers.
- Click Save to save the changes you made to an existing dispatcher, or Create to create a new dispatcher.
The next step is to customize the default dispatcher parameters according to your organization, or if you created a new dispatcher, define the parameters from the start.
- Point to
 , and click
  Edit dispatcher parameters.
 - Fill in the values for the parameters. The parameters are specific to the dispatcher type.
| Name | Default | Description |
|---|---|---|
|
SenderSystemId |
|
The sender system identifier, which is retrieved during the configuration of the system in the e-Boks administration portal. |
|
ReceiverSystemId |
The receiver system identifier, which is retrieved during the configuration of the system in the e-Boks administration portal. |
|
|
URL |
https://rest.e-boks.dk/v1.svc |
The URL for the e-Boks service. Enter one of the URLs depending on whether the configuration is made for test or production. Test system: Production system: |
|
CertificateThumbPrint |
The thumbprint that identifies the e-Boks certificate. |
|
|
ResponseThreshold |
1800 |
Defines the maximum time that SmartPost expects that it takes e-Boks to process a message. Specify the threshold in seconds. The default value is 1800 seconds (30 minutes). The default value is most often used. In situations where the communication with e-Boks is slow, you can increase it. |
|
MaxDocumentSize |
78643200 |
The maximum size of an e-Boks message in bytes. Messages that exceed this limit will not be sent to e-Boks. The default value is 78643200 (75 MB). e-Boks determines the maximum size. If e-Boks changes the size, you can change this configuration accordingly but due to encoding you must reduce the size set by e-Boks by 25%. For example, if the size set by e-Boks is 99,5 MB, you must set the MaxEBoksDocumentSize parameter to 99,5 MB * 75% = 75 MB. |
|
SenderName |
KMD |
The name of the company. |
|
ReceiverUrl |
https://<host-or-database>/EboksPushService/api/MeddelelseV2 |
The URL for receiving messages using Digital Post 2. If the parameter is left empty, the default URL in the Url parameter is used. |
|
DP2Url |
https://demo-api.e-boks.com/oio/rest/srv.svc/2 |
The URL for receiving messages using Digital Post 2. If the parameter is left empty, the default URL in the Url parameter is used. |
| Name | Default | Description |
|---|---|---|
|
SenderSystemID |
The system identifier, which is provided when configuring the system in the Strålfors administration portal. Either Strålfors or the person, who configures the portal for Strålfors, must provide this identifier. |
|
|
Url |
https://prodprint. sconnect.dk/ fjernprint/1.0.0 |
The URL for the Strålfors Connect service. Depending on whether the configuration is made for test or production, enter one of the two URLs. Test: https://testprint.sconnect.dk/fjernprint/1.0.0 Production: https://prodprint.sconnect.dk/fjernprint/1.0.0 |
|
CertificateThumbprint |
Enter the thumbprint that identifies the Strålfors certificate. |
|
|
ResponseThreshold |
-1 |
Defines the maximum time that SmartPost expects that it takes to send a message to Strålfors. This value is used to calculate the deadline (supervised by the deadline monitor). The value is an integer, which (if positive) specifies the threshold in seconds. Normally, the default setting is used. If the communication with Strålfors is very slow, you can specify a high value. |
|
MaxDocumentSize |
375000000 |
The maximum number of bytes that a message for remote print can contain. Messages that exceed this limit will not be sent for remote print. The default value is 375000000 bytes (375 MB). Unless otherwise communicated, it is recommended to keep the values provided at the installation. |
|
SenderName |
KMD |
The name of the company that is used in the postal address. The postal address is used when Strålfors produces the letters. The company name is taken from the address on which the authority will receive letters and returned mail. |
| Name | Default | Description |
|---|---|---|
| URL |
https://privat.doc2mail.dk/ delivery/FileUploader.asmx |
The URL for the OneTooX service. Test: https://test.doc2mail.dk/delivery/FileUploader.asmx Production: https://private.doc2mail.dk/delivery/FileUploader.asmx |
| SystemKey |
Enter the system key in clear text. Copy and paste the content of the system key file (PKE file) that you have received from KMD Printcenter in to this field. If you work with WorkZone Configurator in Microsoft Internet Explorer and encounter problems with the system key not being pasted correctly, please open WorkZone Configurator in Google Chrome and try to paste the key again. |
|
| ResponseThreshold | 600 |
The maximum time in seconds that a communication channel with OneTooX is open. Default is 600 seconds (10 minutes). |
| MaxDocumentSize | 1000000 | The maximum number of bytes that OneTooX will send. Numbers higher than 99600000 will be truncated. |
| SenderName | KMD | The name of the company. |
| Name | Default | Description |
|---|---|---|
| LocalPrintResponseThreshold | 1800 |
Defines the maximum time that SmartPost expects that it takes for local print to process a message. This value is used to calculate the deadline (supervised by the deadline monitor). Specify the threshold in number of seconds. The default value is 1800 seconds (30 minutes). The default value is most often used. |
| SenderName | KMD |
The name of the company. |