Configure WorkZone Process
You use the WorkZone Process Configuration Wizard to configure process packages and service workflows.
Important: The wizard removes any previous configurations when you run it.
- Start the KMD WorkZone Process Configuration Wizard in one of the following ways:
- In the KMD WorkZone Process Setup Wizard, select the Launch WorkZone Process Configuration Utility check box. See Install WorkZone Process.
- From C:\Program Files (x86)\KMD\WorkZone\Process\Bin or C:\Program Files\KMD\WorkZone\Process\Bin, double-click
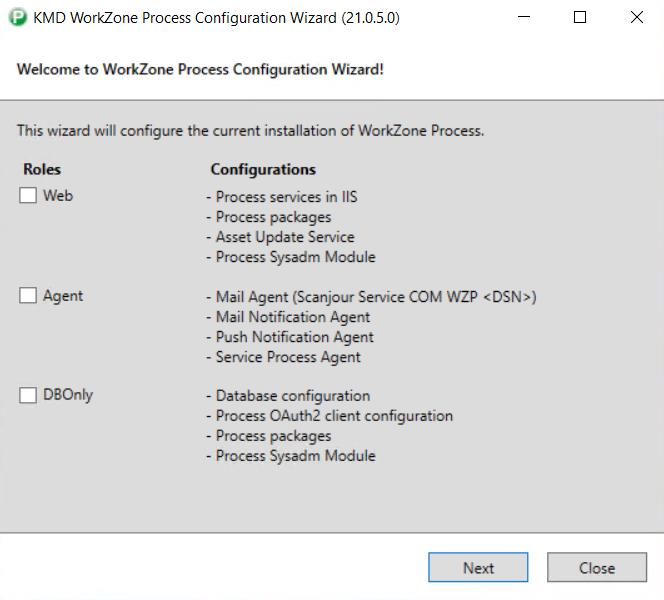
Scanjour.Process.Configurator.exe. - On the Welcome page, select a role, Web, Agent, or DBOnly, depending on what you want to configure, and then click Next.
- Select Web, if you want to install and configure process packages and process service workflows on a web server.
- Process services in IIS - Installs the process site and service workflows in IIS.
- Process Packages - Installs the packages that you select later in this wizard.
- Asset Update Service - If there are database changes, this service ensures that the changes will be downloaded to the web server.
- Process module in WorkZone Configurator - Makes process settings available from the Process menu in WorkZone Configurator.
- Select Agent, if you want to install service workflows and configure agents on an agent server.
- Mail Agent (Scanjour Service COM WZP <DNS>) - Handles sending of smartmails.
- Mail Notification Agent - Handles sending of notifications by email.
- Push Notification Agent - Handles sending of push notifications to mobile devices.
- Service Process Agent - Enables service workflows, such as Mailbox Monitor, F2 Requisition Handler, and e-Boks Message Handler.
- Select DBOnly as the only role, if you just want to configure the database for WorkZone Process. You cannot select this role in combination with the web and agent roles.
- Database configuration - Executes configuration sql scripts.
- Process OAuth2 client configuration - Configures an OAuth2 client for WorkZone Process.
- Process packages - Loads process packages into the database.
- Process SysAdm Module - Loads dependencies for managing process settings into the database.
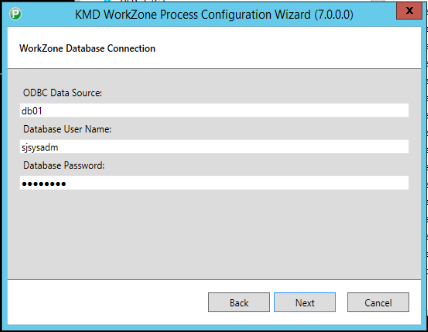
- On the WorkZone Database Connection page, enter the name of the database and the credentials, and then click Next.
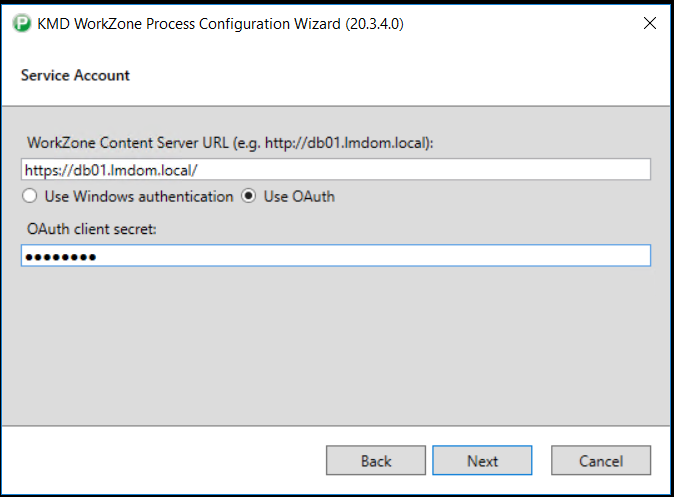
- On the Service Account page, enter the WorkZone Content Server URL, and select the Use Windows authentication check box or the Use OAuth check box depending on the authentication method you want to use.
- Enter the service account information, and then click Next. For example:
-or-
The KMD WorkZone Process Configuration Wizard opens.
All services are installed. You can stop a service in Windows Services, if you do not need it.
Windows authentication
- WorkZone Content Server URL: http://db01.lmdom.local
- User Name: sa_wzprocess
- Domain: lmdom.local
- Password: Password of the service user.

Note: The host should be a Domain Name System (DNS) that can be accessed from all clients.
OAauth authentication
Prerequisite: WorkZone Content Server must be configured to run with OAuth authentication. See The OAuth2 framework and Install WorkZone Content Server.
- WorkZone Content Server URL: http://db01.lmdom.local
- OAuth client secret: <A password>
You can see the WorkZone Process OAuth client configuration in WorkZone Configurator. See OAuth2 settings in the WorkZone Configurator Administrator Guide.
If the WorkZone Process OAuth client is already configured, and you don't know the existing client secret, you have two options:
- Delete the existing WorkZone Process OAuth client from WorkZone Configurator and re-configure WorkZone Process with a new client secret on all servers.
- Overwrite the existing WorkZone Process OAuth client with a new client secret in WorkZone Configurator and reconfigure WorkZone Process on all servers with the new secret.
Important: After completion of the WorkZone Process Configuration Wizard, verify that Anonymous Authentication is enabled for the Process site in the IIS Manager if you use OAuth authentication.
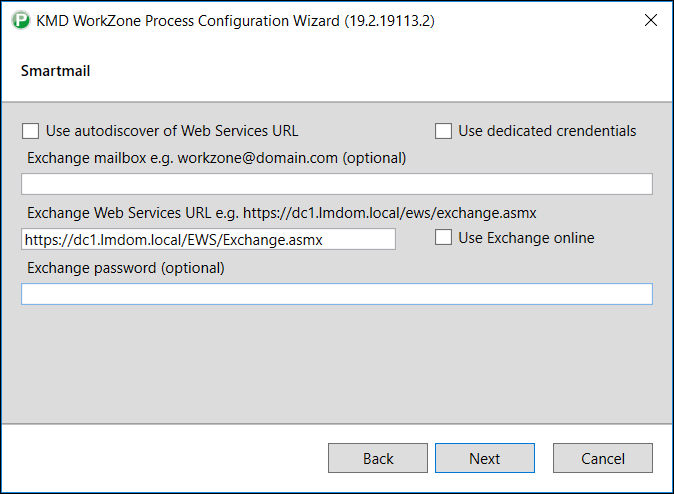
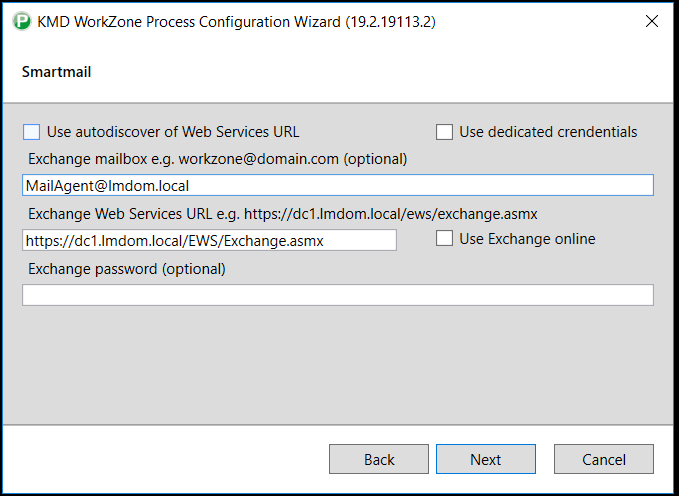
- On the Smartmail page, fill in the fields depending on how you want WorkZone Process to handle sending of smartmails and email notifications using Exchange On-Premises or Exchange Online.
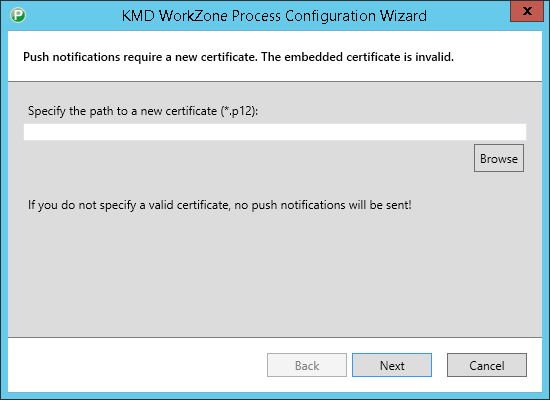
- On the Push notifications require a new certificate page, click Browse to select a valid certificate and then click Next. If the certificate expires, push notifications will no longer be sent.
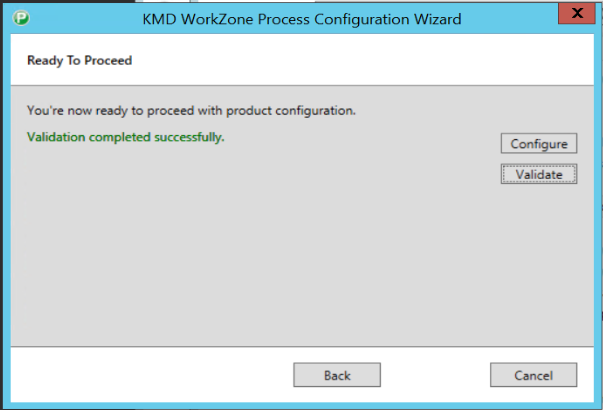
- On the Ready To Proceed page, you can choose to validate prerequisites or start the configuration right away:
If you select the Use autodiscover of Web Services URL check box and autodiscover for Exchange is set and your service account user is mapped to an Exchange user, you can click Next without making any changes on this page. See Exchange prerequisites and Service accounts.
Note: You cannot use the autodiscover option, if you have configured WorkZone Process to use OAuth authentication. You must enter dedicated credentials for the user name, password, domain, and URI. See Dedicated credentials.
You can configure Exchange in different modes.
Service account user
In this mode, Exchange will be configured to use the credentials of the service account user. The mail agents will use this account to connect and send emails.
To activate this mode, fill in the Exchange Web Services URL field.
Service user account on behalf
This mode is the same as the Service account user mode except that when the mail agent sends emails, the emails will be sent on behalf of the email account specified in the ExchangeMailbox field.
To activate this mode fill in the Exchange mailbox and the Exchange Web Services URL fields.
Mailbox credentials
In this mode, the account specified in the Exchange mailbox field together with the Exchange password field is used as credentials for accessing the Exchange server when the mail agents send emails. This mode is typically used for accessing Exchange Online but it can also be used for an different On-Premises account.
To activate this mode, fill in the Exchange mailbox, the Exchange Web Services URL, and the Exchange password fields.

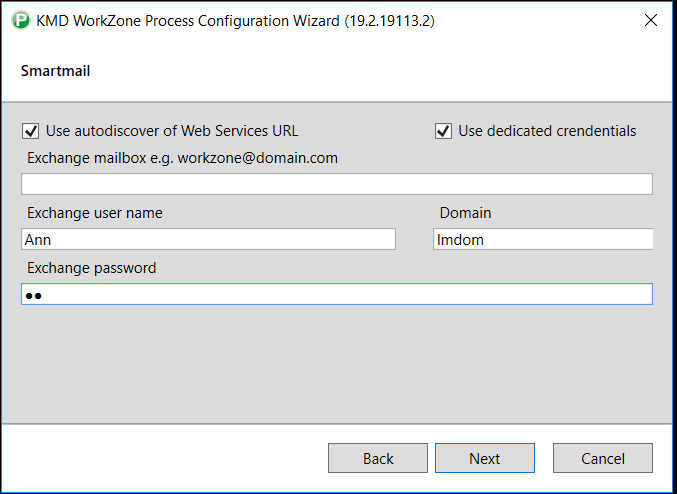
Use autodiscover of Web Services URL
If you select the Use autodiscover of Web Services URL check box, you do not need to fill in the Exchange Web Services URL. This field will be filled in automatically using the Exchange autodiscover service, if it is available.
The mail agents will use the autodiscover service to find the Exchange endpoints every time the services are started.
Use Exchange Online
If you select the Use Exchange Online check box, the Exchange Web Services URL field is filled with the default address of Exchange Online. The value is not stored in the mailagents settings. If you fill in the Exchange Web Services URL field manually, it will have the same effect.
You can use dedicated credentials if you want to use a different specific user account. If you select the Dedicated credentials check box, you must fill in the Exchange user name, the Domain and Exchange password fields.
In the example, a local user account is used as the exchange account for the mail services.
Note: This page only appears if the current mobile certificate is no longer valid.
- Click Configure to start the configuration. The WorkZone Configuration Wizard removes any previous configurations before applying your configurations.
- Click Validate, if you want to validate that prerequisites and features connected with the specific role are in place before you start the configuration. If some prerequisites or features are missing, error messages will be listed.
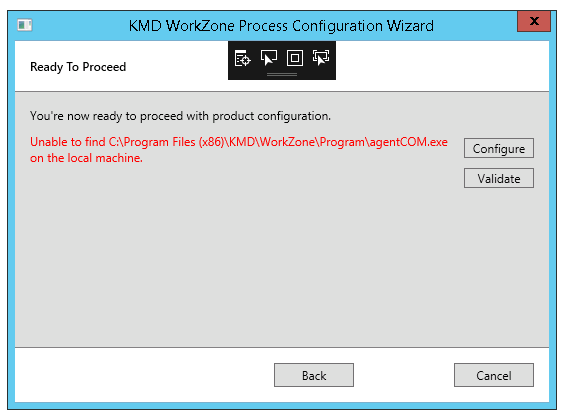
If all prerequisites are in place, you will see the message Validation completed successfully, and you can then click Configure to start the configuration.
Prerequisites (always validated)
- WorkZone Content Server is installed.
- Correct version of WorkZone Content Server is installed.
- SQL*Plus is installed (sqlplus.exe exists).
- CaptiaLoadDataDict is installed (loaddatadict.exe exists).
- At least one role is selected.
- Database connection.
- WorkZone Configurator version is not older than the installed version of WorkZone.
- The specified service account user name (usually sjserviceagentuser4) exists in the specified domain (for example,
lmdom) on the Service Account page. - The service user (usually sjserviceagentuser4) has been granted the ‘Log OnAsService’ privilege
- The connection to WorkZone Content Server.
- The executing user exists in the database/the user is a WorkZone user. Validates if the user exists in the Users table.
Agent role validation
- The connection to the Exchange server.
- AgentCOM is installed (agentCOM.exe exists).
- Valid certificate for the Push Notification Agent.
- Access to Apple Push Notification Service.
- Notification Agent Host is installed (Scanjour.Process.Notification.AgentHost.exe exists).
Web Role validation
- Correct version of IIS is installed.
- The WorkZone site and OData services exist in IIS.