Dashboard
The dashboard is a start page of WorkZone Client and it is located on the Home tab. The dashboard provides you with an overview and easy access to lists that are displayed in the form of widgets. If you want to add other widgets, configure their types or change their location, you can configure the dashboard to suit your personal preferences.
You can view the most common, saved, or shared lists in widgets that are displayed on the dashboard. You can select the widgets to be displayed and arrange their positions.
- On the Home tab, select Dashboard on the Navigation pane and click
 Personalize on the main ribbon. The Dashboard configuration dialog box is displayed. The Available widgets pane shows the available lists that you can add to the dashboard. Next to them, you can see a scheme of the widgets (framed in green) that are currently displayed on your dashboard.
 - Configure the widgets:
- To add a new widget, double-click or drag and drop the widget from the Available widgets pane to the desired positions on the dashboard.
- To remove a widget from the dashboard, double-click it.
- To resize a widget, hover the mouse over its green border and drag and drop it to the desired position.
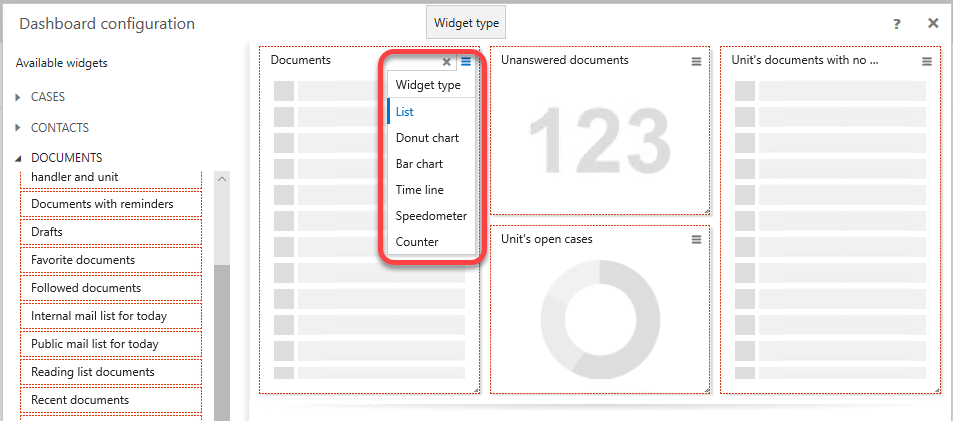
- To select the type of widget, click
 on the widget. See Types of widgets.
 - Click Save.
Click Reset to discard your changes and return to the default configuration of the dashboard.
You want to see a list of your cases created within the last week on the dashboard.
- Perform a search for cases with you as a case handler within the last week (type
-7in the Created date from field). - Save the search.
- On the Home tab, click Personalize to open the Dashboard configuration form.
- Open My lists and drag your saved search from step 2 to the dashboard.
- Click Save. On the Dashboard, you can now see the search that shows the cases that you have created within the last week.
If the widgets you want to view do not fit to one screen, you can configure multiple dashboards. Each dashboard may represent specific sets of widgets that you define. You can add, rename, hide, and delete dashboards.
- Go to the Home tab and click
 Dashboard on the main ribbon.
 - Specify name for the new dashboard.
- Click Save.
- Click in the navigation pane to open the Available lists pane.
- In the Dashboard section, click the
 icon related to the relevant dashboard and select Rename dashboard
 - In the Edit dashboard form > Dashboard name field, specify the new name.
- Click Save to save your changes and close the Edit dashboard form.
- In the Available lists pane, click Apply to apply your changes.
Move a dashboard into and from the navigation pane
- Click in the navigation pane.
- Drag the dashboard name into or from the navigation pane
- Click Apply.
- Or -
Click Deselect navigation item to move a dashboard from the navigation pane.
Remove a dashboard from WorkZone Client
- Click in the navigation pane to open the Available lists pane.
- In the Dashboard section, click the icon related to the relevant dashboard and select Remove dashboard
- In the Confirm dialog, click Yes to remove the dashboard. The dashboard is no longer available and cannot be restored.
- In the Available lists pane, click Apply to apply your changes. The dashboard is still removed and cannot be restored.