Custom droplists
To configure custom droplists, you must have the DATAADM access code.
There are five types of custom fields: text, date, decimal, integer, and droplist. In this section, you will learn how to create a new custom droplist that is relevant to your organization.
Each droplist must have at least one value. Therefore, you create a custom droplist, and then you create its values.
- To have a custom droplist as an additional available field on the WorkZone Client user interface, you must create a custom droplist, and then you must create a custom field. Only custom fields appear on the Available fields panel.
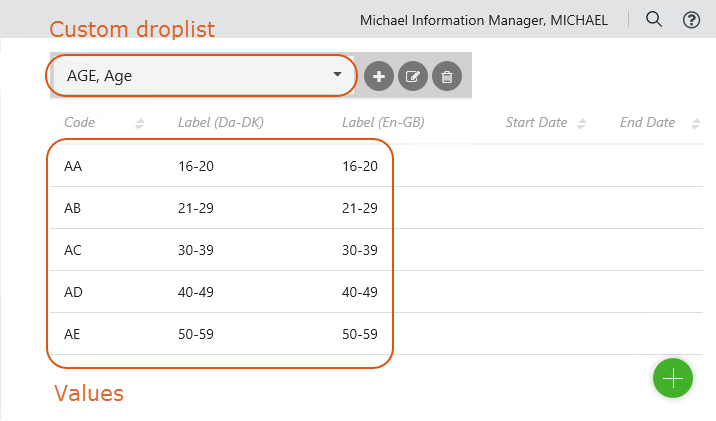
- Droplist values are sorted by codes. Order of creation is disregarded. Consider this characteristic if the order of values matters.
- On the start page, select Global.
- On the Custom droplists tab, click
 Create droplist.
 -
Fill in the following fields in the Create custom droplist dialog box:
- Label by default – The default name that is visible when you add a new custom field.
- Code – The code in the database.
- Localize label – Optionally, specify names in other languages.
- Selectable - Disable to make this value non-selectable for the WorkZone Client users.
- Start date – The date when the custom droplist becomes active. Before the start date, the custom droplist is invisible on the user interface.
- End date – The date when the custom droplist is deactivated. After the end date, the custom droplist becomes invisible on the user interface.
Note: Non-selectable values can still be set as the default values and will be visible to the users in WorkZone Client, but users will not be able to select them (or to re-add them, if the user has changed the non-selectable default value to something else).
- Click Save.
- Select a droplist that you want to edit from the drop-down list on the top.
- Click
 Edit droplist.
 - Apply the required changes in the Edit custom droplist dialog box.
- Click Save.
Note: You cannot edit the Label by default and Code values.
You can only delete a droplist if it is not used in any custom field.
- Select a droplist that you want to delete from the drop-down list on the top.
- Click
 Delete droplist.
- Select a droplist to which you want to add a value.
- In the bottom-right corner of the page, click
 Create.
 -
Fill in the following fields in the Create custom droplist value dialog box:
- Label by default – The default name that is visible for users.
- Code – The code in the database.
- Localize label – Optionally, specify names in other languages.
- Rank – An integer number that indicates value priority (1 has the highest priority). Priorities can be later used by WorkZone products or third party integrations.
- Selectable - Enable to make this value non-selectable for the users.
- Start date – The date when the droplist value becomes active. Before the start date, the droplist value is invisible on the user interface.
- End date – The date when the droplist value is deactivated. After the end date, the droplist value becomes invisible on the user interface.
Note: Non-selectable values can still be set as the default values and will be visible to the users in WorkZone Client or WorkZone 365, but users will not be able to select them (or to re-add them, if the user has changed a non-selectable default value to something else).
- Click Save.
- Select a droplist on which you want to edit a value.
- Point to the desired value, and click
 Edit.
Edit. - Apply the required changes in the Edit custom droplist value dialog box.
- Click Save.
Note: You cannot edit the Label by default and Code values.
You can only delete a droplist value if it has not yet been used by WorkZone Client users.
- Select a droplist from which you want to delete a value.
- Point to the desired value, and click
 Delete, and then click Delete.