Service accounts
WorkZone requires the following service accounts to install WorkZone PDF, WorkZone Process, and WorkZone Mass Dispatch:
WorkZone PDF
Important: By default, the crawler user is defined as system. In this case, the WorkZone PDF service will be executed as a Local System (see Microsoft documentation), and you do not need to follow the steps described below.
To install and run the WorkZone PDF crawler service, you need to grant the "Log on as a service" rights for the crawler user.
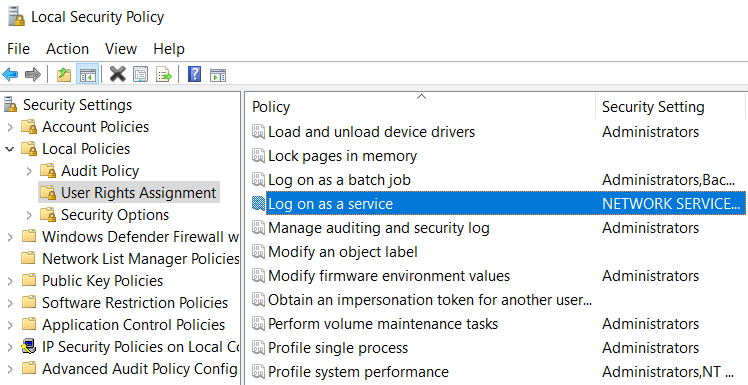
- Go to Local Security Policy > Local Policies > User Rights Assignment.
- Find Log on as a service among listed policies and double-click it.
- Click Add User or Group...
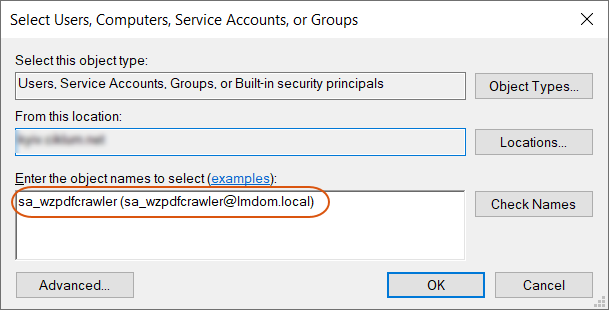
- Enter the crawler service user:

- Click OK.

Before you install WorkZone Process or WorkZone Mass Dispatch, you must create a service user in Active Directory (AD).
Requirements for the service account:
- It can have any name. In the following, the service user is referenced as SOMESERVICEUSERNAME.
- It must be set up with the "Log on as a service" privilege.
- It must not be a member of any WorkZone replication groups, or used for any other WorkZone-related purposes or configurations as the SID of this user will be associated with a specific WorkZone user named SJPROCESSUSER in the WorkZone database.
When you configure WorkZone Process, enter the credentials of service account in the KMD WorkZone Process Configuration Wizard on the Service Account page. The configurator will take care of the SID association when you click Next to move on. See Configure WorkZone Process.
Assign an exchange account to a service account
The service account must have an exchange account to be able to send smartmails or to act as a delegate for another account that sends smartmails. To set up the exchange account for the service account in the Exchange Management Console, create a new mailbox for the existing AD service account.
- Open Microsoft Exchange Management Console.
- Right-click Mailbox under Recipient Configuration, and select New Mailbox.
- In the New Mailbox wizard, under Choose mailbox type, select User Mailbox, and click Next to proceed.
- Under Create mailboxes for, select Existing users.
- In the Select User dialog box, select the service user, and click OK.
- Complete the wizard by entering a name alias and click New.
Service account acting on behalf of an account with an ordinary user name
If you want smartmails that are issued from a service account to appear as if they are sent from a user account with an ordinary user name, the service account must be assigned the permission to act on behalf of this user.
If a permission setup has not been created for a service account, smartmails that are sent from the service account will appear under a user name. To make smartmails from a service account appear as if they are sent from an ordinary email account, the service account must be assigned permissions from the email account that belongs to the ordinary email user.
- Open Microsoft Exchange Management Console.
- Click Mailbox under Recipient Configuration.
- On the list of accounts, right-click the mail account of the user that should appear as the sender of smart tasks that are sent by the service user, and select Manage Send As Permissions.
- In the Manage Send As Permissions wizard, click Add, and select the service user.
- Click Manage, and complete the wizard.
