Letter template
A letter template is a Microsoft Word document that you want to send to recipients using WorkZone Mass Dispatch. The template includes the mandatory opening and closing merge fields and the body of the letter with custom merge fields. The custom merge fields will be populated with values when the template is merged with the contact information from the recipient list. The values represent information such as name, address, and other data for each particular contact.
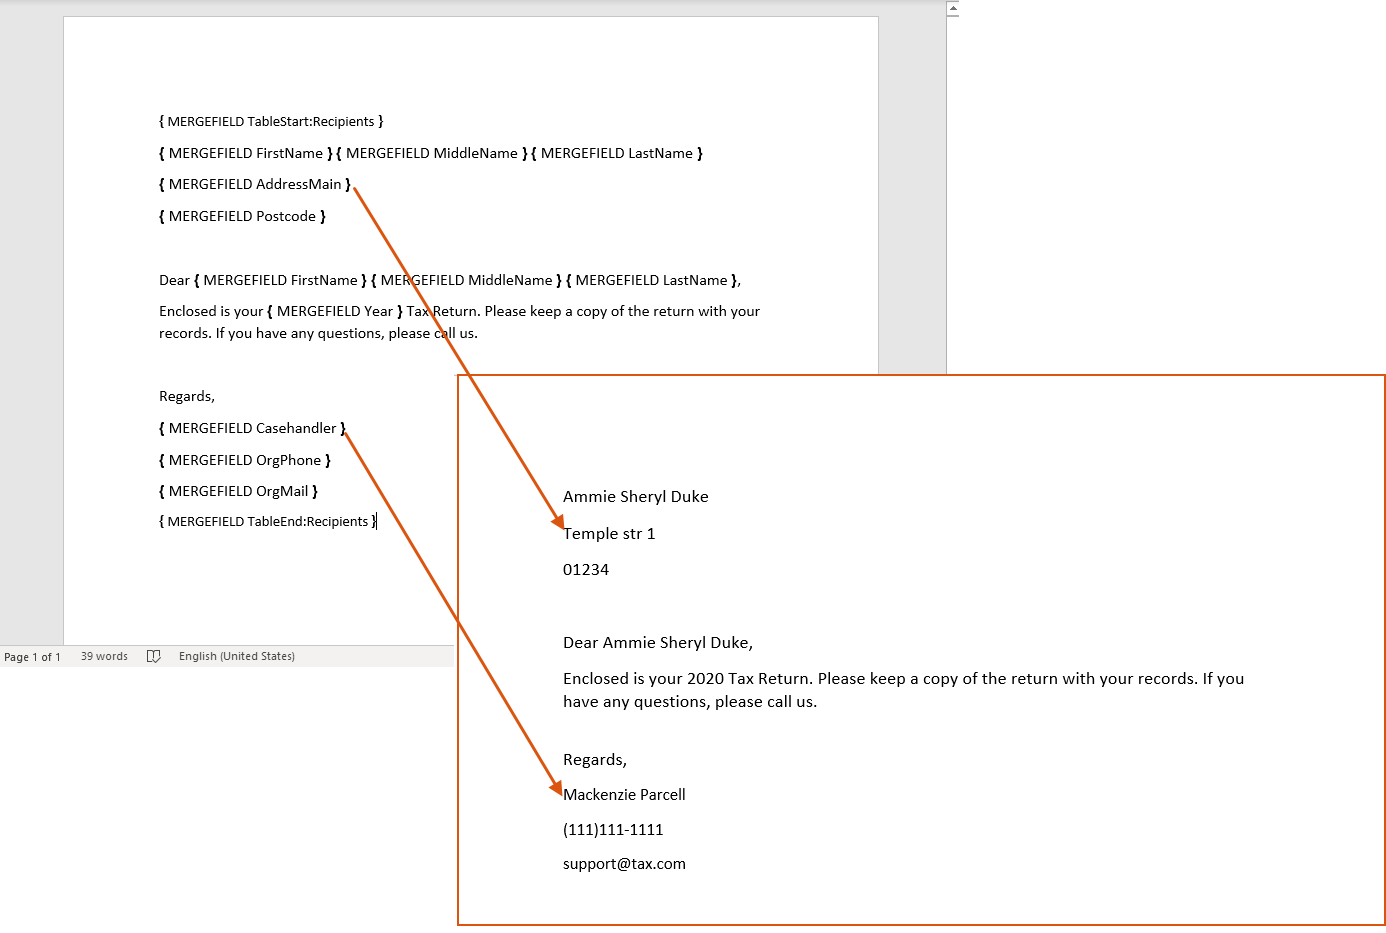
The structure of merge fields is the following: in curly braces, MERGEFIELD and then the alias of the field, for example,{ MERGEFIELD FirstName }.
- Press Alt + F9 to view merge fields in curly braces.
- Type the main opening and closing merge fields of your letter template. They will be
{MERGEFIELD TableStart:Recipients }and{MERGEFIELD TableEnd:Recipients }, respectively, if the name of the Microsoft Excel data sheet containing the contacts is called Recipients. The body of the letter must be placed between these two fields.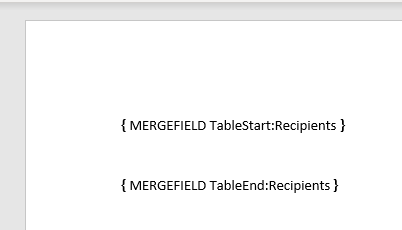 Important: If you have custom sets of schema and data sheets, you will need to enter other sets of opening and closing merge fields inside the main ones.
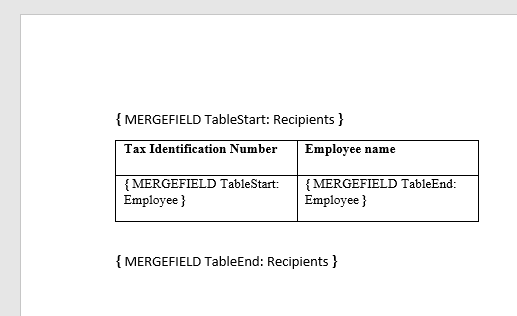
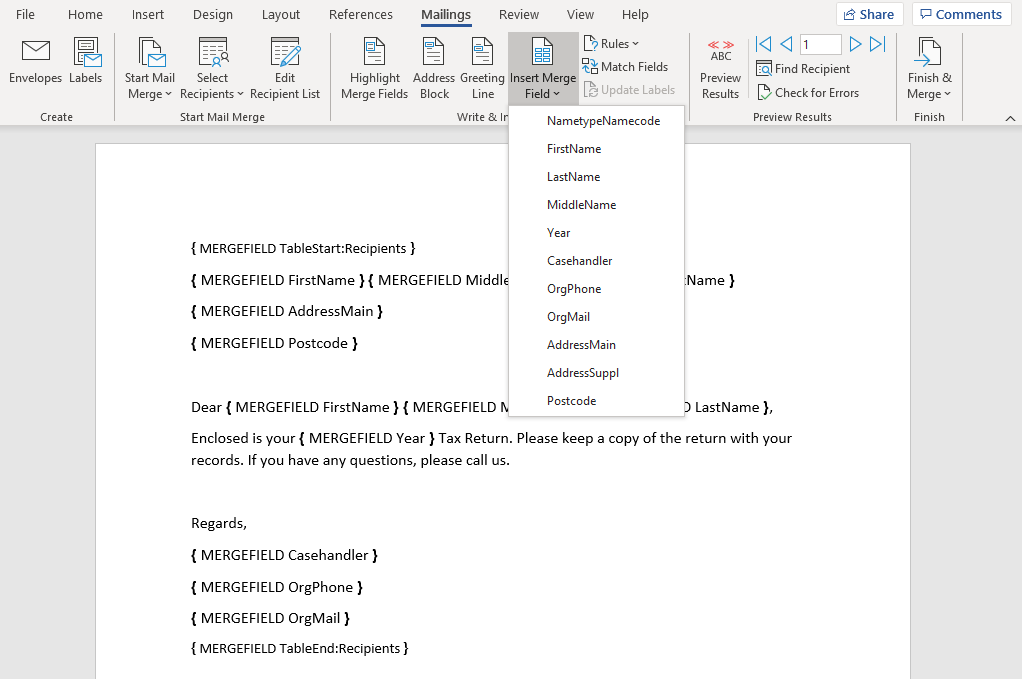
- Connect to your recipient list in Excel. Go to Mailings > Select Recipients > Use an Existing List... > select the Excel file with the recipient list > select the Contacts tab and leave the First row of data contains column headers option checked > click OK.
- Type the body of your letter. Use Insert Merge Field of the Mailings tab, to add a merge field when you need to include the information specified in the recipient list.
 Tip: You can preview your letter by selecting Preview Results in the Mailings tab in Microsoft Word.
 - Save your changes.
Tips for formatting date, currency, and number
Use a switch in Microsoft Word to format the results of the merge field. You can change the date, time, currency, and number format in your letter template to whatever you like.
- Select the merge field you want to change.
- Press Alt + F9 to view the field coding in Microsoft Word. The field you have selected should now look like this:
{ MERGEFIELD Date }. - Add the formatting data to the merge field using the numeric picture switch (
\#) for currency and number fields or the date-time picture switch (\@) for date fields. See some examples below. - Right-click the merge field and select Update Field.
| Date field code with picture switch and format specifiers | Displayed in the letter |
|---|---|
{ MERGEFIELD Date\@ "MMMM d, yyyy" }
|
March 29, 2021 |
{ MERGEFIELD Date\@ "dd/MMM/yy" }
|
29/Mar/21 |
|
|
29 March 2021 |
See more about date and time format specifiers in the Microsoft documentation.
| Numeric field code with picture switch and format specifiers | Displayed in the letter |
|---|---|
|
|
$1220.00 |
|
|
1220 |
|
|
$1,220 |
See more about the numeric format specifiers in the Microsoft documentation.