Create a SmartPost dispatcher
You can create a customized SmartPost dispatcher that allows you to send documents through a new channel. This is useful if the current channels are not sufficient, or if the customer has a custom system for sending messages or a proxy/gateway that routes traffic to e-Boks or Strålfors.
This topic describes how to develop a custom dispatcher using the SDK that is part of any WorkZone process installation. The SDK is located in the SDK subfolder in Process installation folder. The default location is: C:\Program Files (x86)\KMD\WorkZone\Process\SDK\SDK.zip.
To assist you in developing a custom dispatcher, you can use a sample dispatcher, which is included in the SDK. The sample dispatcher uses an Exchange server to send documents if the recipient has a legal email address. The sample dispatcher is located in the SDK\exampleprojects\ExchangeDispatcher folder.
You develop dispatcher as a .NET framework application preferably using the C# language. You can build the sample project using Microsoft Visual Studio 2017 or 2019.
Compile and install the sample dispatcher
You compile the dispatcher in Visual Studio by opening the project named Workzone.Dispatcher.Exchange.csproj.
When you have compiled the sample project, you can find a WorkZone Process package named ExchangeDispatcher.wzp in the output folder, for example in bin\debug.
Use the package loader to load the package in to WorkZone.

After loading a package, you need to recycle the WzpSv capplication pool.
Restart-WebAppPool WzpSvc
See Configure packages.
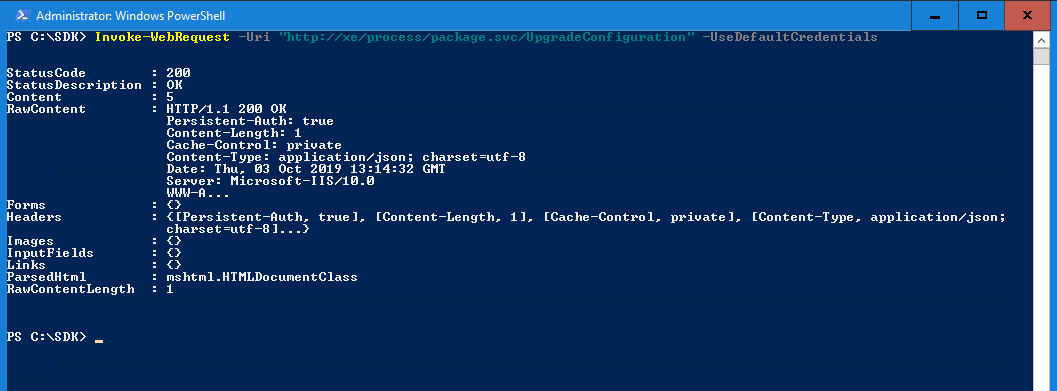
The configuration for the dispatcher is created by calling the method UpgradeConfiguration on the process package service:
http://<database>/process/package.svc/UpgradeConfiguration
You can use a browser or PowerShell:

The return value (5 in the example) corresponds to the number of dispatchers that are upgraded. If the number is less than zero, it indicates an error. You can find the description of the error in the application event log with source Scanjour Workflow Host.
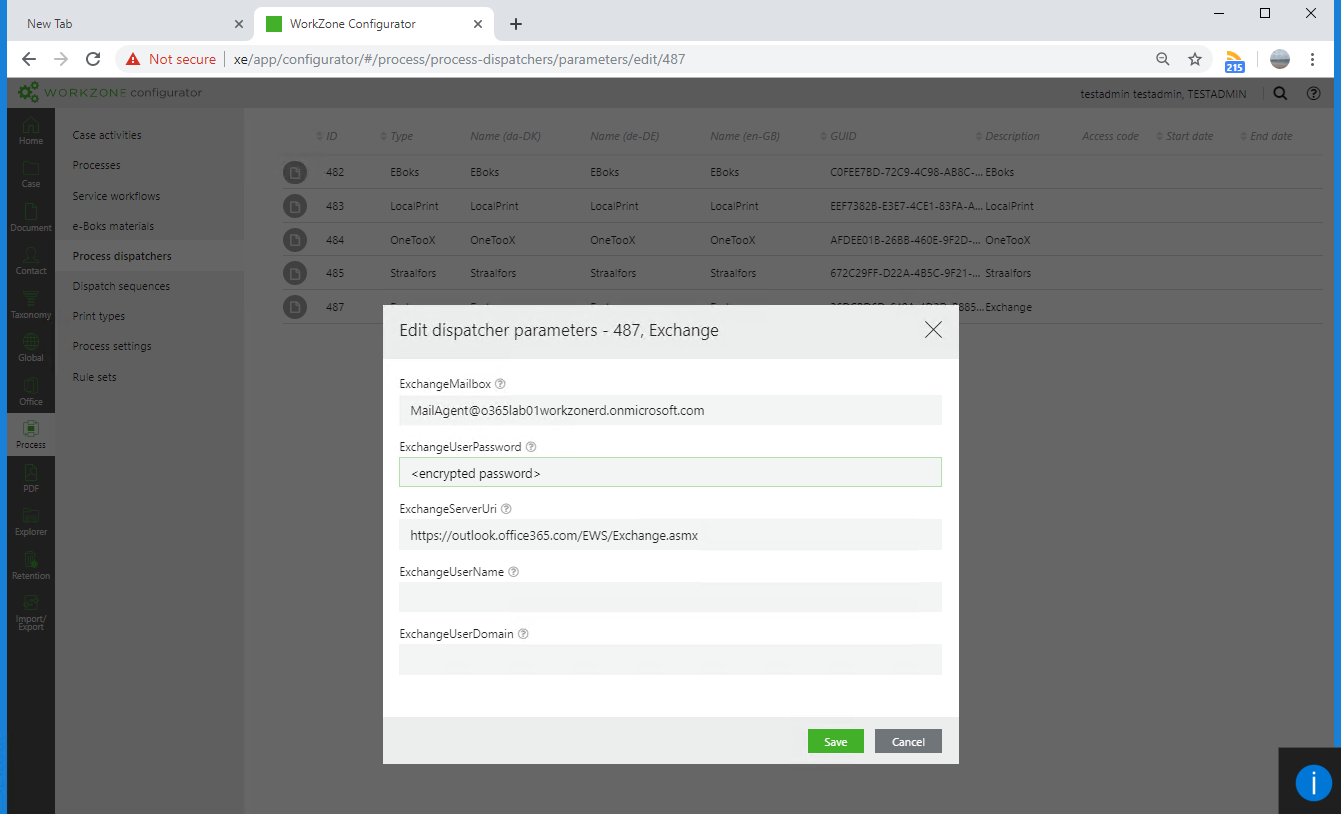
After successful installation and upgrade, you can configure the new dispatcher in WorkZone Configurator:

The sample dispatcher uses the same Exchange library as the rest of SmartPost.
See also Configure dispatchers in the WorkZone Process Administrator Guide.
Test the sample dispatcher
If you want to test the sample dispatcher in practice, it is important to configure the dispatcher to be able to send emails and then you must provide an encrypted password.
Scanjour.Process.MailAgent.dll.config in the c:\program files (x86)\kmd\workzone\process\bin folder.
Add the sample dispatcher to a dispatch sequence
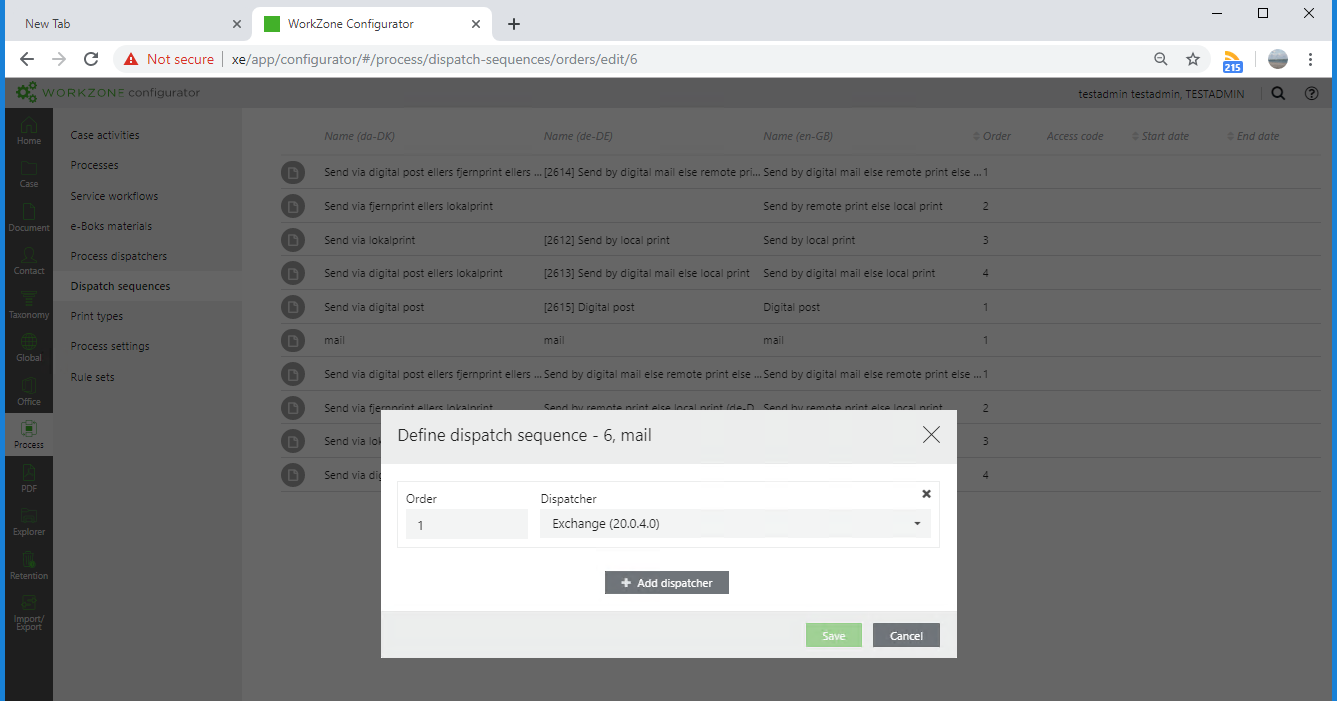
To use the sample dispatcher for sending documents, it must be part of a dispatch sequence.

In this example, a new dispatcher sequence named mail is created. It only contains the sample dispatcher.
See also Configure dispatch sequences in the WorkZone Process Administrator Guide.
Use the sample dispatcher
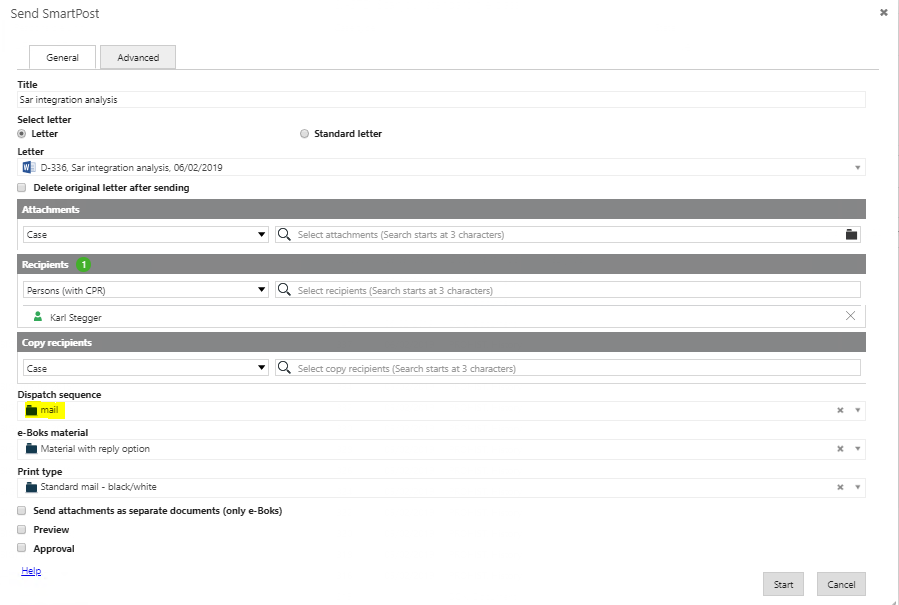
When the dispatcher sequence has been defined, it is possible to start a SmartPost process using the dispatcher sequence, in this example named mail:

Test the sample dispatcher
If you want to test the sample dispatcher in practice, it is important that you configure the dispatcher to send emails and then you must provide an encrypted password.
Scanjour.Process.MailAgent.dll.config in the c:\program files (x86)\kmd\workzone\process\bin folder.