Updated: 27/06/2024
Register information
When you save an Outlook item on a case, you need to register the item's information.
Select documents to be saved
You can see the Outlook item and its attachments in the upper pane. By default, they are preselected.
The attachments are automatically saved on the same case as supplementary documents. You can view and manage the attachments as any other supplementary documents from the navigation pane under the Cases & Documents folder.
- Clear the check boxes to exclude unwanted document.
- Specify main documents:
- If you want all attachments to be saved as main documents on a case, select Mark all as main document. Clear the check box, if you want only the Outlook item itself becomes a main document.
- Select the document you want to set as the main document and click Set as main document.
-Or-
Define document parameters
- Title – By default, the title inherits the subject of email, but you can change it.
- Document Group – Select the group to which the document belongs, for example, Decision, Confirmation, Consultation.
- Document Type – The document type indicates whether the document is, for example, incoming, outgoing, or internal.
- Classification – Classification orders and prioritizes data based on its sensitivity. By default, classification code is inherited from the selected case, but you can change it in this field. Note that supplementary documents inherit classification code from their main documents.
If these values are not defined, global classification code will be applied.
Important:
- Classification on the unsaved document is updated every time you change its main document or case.
- Classification on the saved documents is not automatically updated when you change classification on the documents' case or main document.
- Letter Date – By default, the letter date is the sent date of the saved email or appointment. Click the calendar
icon
 to change the letter date.
Sender and recipient information
The contacts listed in the To, Cc, and From fields of the saved Outlook item automatically become document parties. Besides that, when you save an Outlook item to a case or create a new case, the system will search for additional matching contacts to use in the registration.
- The system will not suggest adding contacts based on Cc recipient information.
- Registered contacts that match the sender, recipient and Cc recipient information will be added to the Sender and Recipient information list.
- If the system can detect a relationship between additional contacts, they may be added or suggested for adding.
- If the sender or the recipient on an Outlook item can be uniquely matched to a party on the case where you save the Outlook item, the party will be added in the registration dialog box as a known contact.
Add document parties
-
Click the Add/Remove button.
-
Search for the required contacts:
- To find a contact by any word in its meta data, type free text in Search for the words and click Search.
- To display a specific group of contacts, select a filter from Search in.
- To display contact of a specific contact types, select a filter from Type.
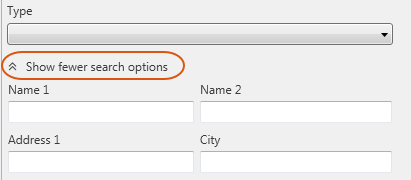
- To search by name, address, or city, click Show more search options. Click Show fewer search options to collapse this section.
- In the lower left pane, select a party
and click the right-arrow button
 .
Repeat this step for each party you want to add.
 - If necessary, specify roles for the parties.
- Click OK.
Remove document parties
- Select the document party you want to remove in the Current selection pane.
- Click the left-arrow button
 .
. - Click OK.
Create a new contact
If the Outlook item contains an unknown contact (that is, a contact with an email address that does not match any existing contact), you can save this contact as a new contact.
- In the Save Outlook Item dialog box, right-click the unknown contact icon under Sender and Recipient information.
- Click Create New Contact. The New Contact dialog box is displayed. The email address field is automatically filled in.
- Fill in the required fields:
- Type – Contact type is a mandatory attribute of each WorkZone contact. Contact types help group contacts in the Contact register and define the contacts' ID format.
- ID – The ID field depends on your choice in the Type field. For example, if you choose Persons (with CPR) in the Type field, you must enter a CPR number in the ID field.
- Click Create Contact. The contact you have created is now displayed as a known contact.
Manage document references
Document references are the documents that relate to the current document. The role (for example, Copy, Mail) defines how the documents relate to each other.
Add document references
-
In the Related Documents panel, click the Add/Remove button.
-
Search for the required documents:
- To find a document by any word in its meta data or body, type free text in Search for the words and click Search.
- To display a specific group of documents, select a filter from Search in.
- To search by document number, case handler, or title, click Show more search options. Click Show fewer search options to collapse this section.
- In the lower left pane, select a document
and click the right-arrow button
 .
Repeat this step for each document
you want to add.
 - If necessary, specify roles for the documents.
- Click OK.
Remove document references
- Select the document reference you want to remove in the Current selection pane.
- Click the left-arrow button
 .
. - Click OK.


