Install WorkZone for Office server
Install manually
- Double-click the
KMD WorkZone Office Server.msifile. The Open file – Security Warning dialog box is displayed. - Click Run. The KMD WorkZone Office Server Setup wizard is displayed.
- Click Next. The End-User License Agreement page is displayed. Read the terms and conditions and select the I accept the terms in the License Agreement check box.
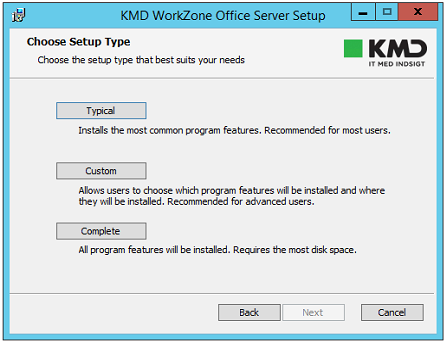
- Click Next. The Choose Setup Type page is displayed.
- Click Typical. The Ready to install KMD WorkZone Office Server page is displayed.
- Click Install. After installation, the Completed Setup Wizard page is displayed.
- Click Finish.

Important: After you install WorkZone for Office server, you must update the database manually via dbconnect.exe.
Update the database
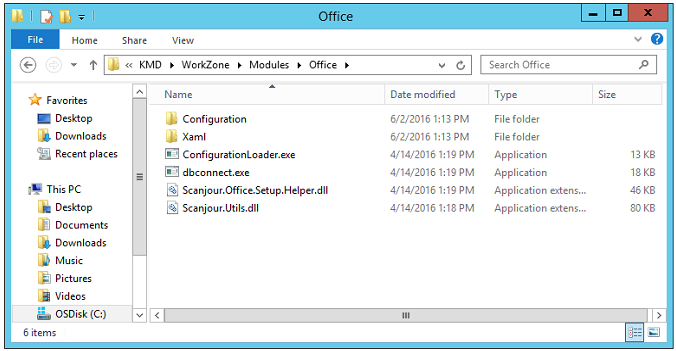
The Office Server installer installs all configuration files and tools into the file system under C:\Program Files (x86)\KMD\WorkZone\Modules\Office.

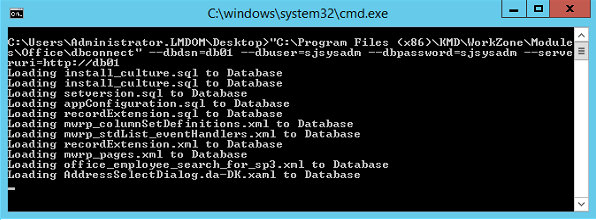
When you have completed the installation, you can load the configuration into the database via the dbconnect.exe command line tool. It is located in the Office folder.

dbconnect.exe is a command line tool which enables you to load and unload database configuration files, SQL scripts, and XAMLs (dialog boxes).
This tool has the following options:
/dbdsn=<dsn>– The name of the database to be updated (required)./dbuser=<user>– The name of the database user (required)./dbpassword=<password>– The password of the database user./serveruri=<protocol>://<hostname>– Protocol and hostname for the oData service./u– Unloads installed data from the database (optional)./log=<path>– Writes log to the file at the specified address (optional).
c:\Program Files (x86)\KMD\WorkZone\Modules\Office\dbconnect.exe /dbdsn=demo /dbuser=sjsysadm /dbpassword=xyzz /serveruri=https://demo.captialive.com /u
Important:
- Restart IIS (Internet Information Services) for the configuration changes to take effect on the server.
dbconnect.exeupdates only one database at a time. If you want to update multiple databases, run it several times with a different/dbdsnoption.
Upgrade the WorkZone for Office server
Prerequisite: Before you upgrade the WorkZone for Office server, it is recommended you remove from the database the data installed as a part of the current installation.
- Run
dbconnect.exewith the/uoption to remove previously installed data from the database. - Uninstall the old WorkZone for Office server package from Programs and Features.
- Install the new WorkZone for Office server package.
- Run
dbconnect.exewithout the/uoption to update the database.
Update the database
The Office Server installer installs all configuration files and tools into the file system under C:\Program Files (x86)\KMD\WorkZone\Modules\Office.

When you have completed the installation, you can load the configuration into the database via the dbconnect.exe command line tool. It is located in the Office folder.

dbconnect.exe is a command line tool which enables you to load and unload database configuration files, SQL scripts, and XAMLs (dialog boxes).
This tool has the following options:
/dbdsn=<dsn>– The name of the database to be updated (required)./dbuser=<user>– The name of the database user (required)./dbpassword=<password>– The password of the database user./serveruri=<protocol>://<hostname>– Protocol and hostname for the oData service./u– Unloads installed data from the database (optional)./log=<path>– Writes log to the file at the specified address (optional).
Example:
c:\Program Files (x86)\KMD\WorkZone\Modules\Office\dbconnect.exe /dbdsn=demo /dbuser=sjsysadm /dbpassword=xyzz /serveruri=https://demo.captialive.com /u
Important:
dbconnect.exeupdates only one database at a time. If you want to update multiple databases, run it several times with a different/dbdsnoption.- Restart IIS (Internet Information Services) for the configuration changes to take effect on the server.
Repair
You can restore damaged installation files by repairing the installation. Right-click the .msi file, and then select Repair, or go to Programs and Features, and select Repair.
- If the database is damaged, rerun
dbconnect.exeas described in Update the database.

