Install WorkZone 365
The installation process consists of two steps:
- Installing the WorkZone 365 server.
- Installing WorkZone 365 client by uploading manifests.
Install WorkZone 365 server
- Double-click the
KMD WorkZone Office Setup.msifile. - Click Run, and then click Next.
- Read the terms and conditions and select the I accept the terms in the License Agreement check box. Click Next.
- Click Install, and then click Finish.
Download manifests
Before installing, you must download the manifests from the WorkZone server. Use this link with the proper host name:
https://[hostname]/app/office/webaddins/office/OfficeManifest.xml
https://[hostname]/app/office/webaddins/outlook/meeting/MeetingManifest.xml
https://[hostname]/app/office/webaddins/outlook/mail/MailManifest.xml
Adjust the MeetingManifest.xml
Tip: Save a copy of each manifest locally to easily access GUIDs. It will help you monitor all your instances and versions of WorkZone 365 for Outlook.
If you use multiple instances of WorkZone 365 for Outlook on the same Exchange server, or different versions of WorkZone 365 for Outlook on the same Exchange server, you must change WorkZone 365 GUID in the MeetingManifest.xml.
- Generate a new GUID by using any online GUID generation tool, for example, GUID Generator.
- When GUID is updated, upload manifest to the Exchange Admin Center.
Install WorkZone 365 client for Microsoft Office 365
You can install WorkZone 365 for Microsoft Office 365 that includes Word, Excel, PowerPoint, and Outlook by using:
- Microsoft 365 admin center (web interface), or
- Microsoft PowerShell (command line).
Use web interface
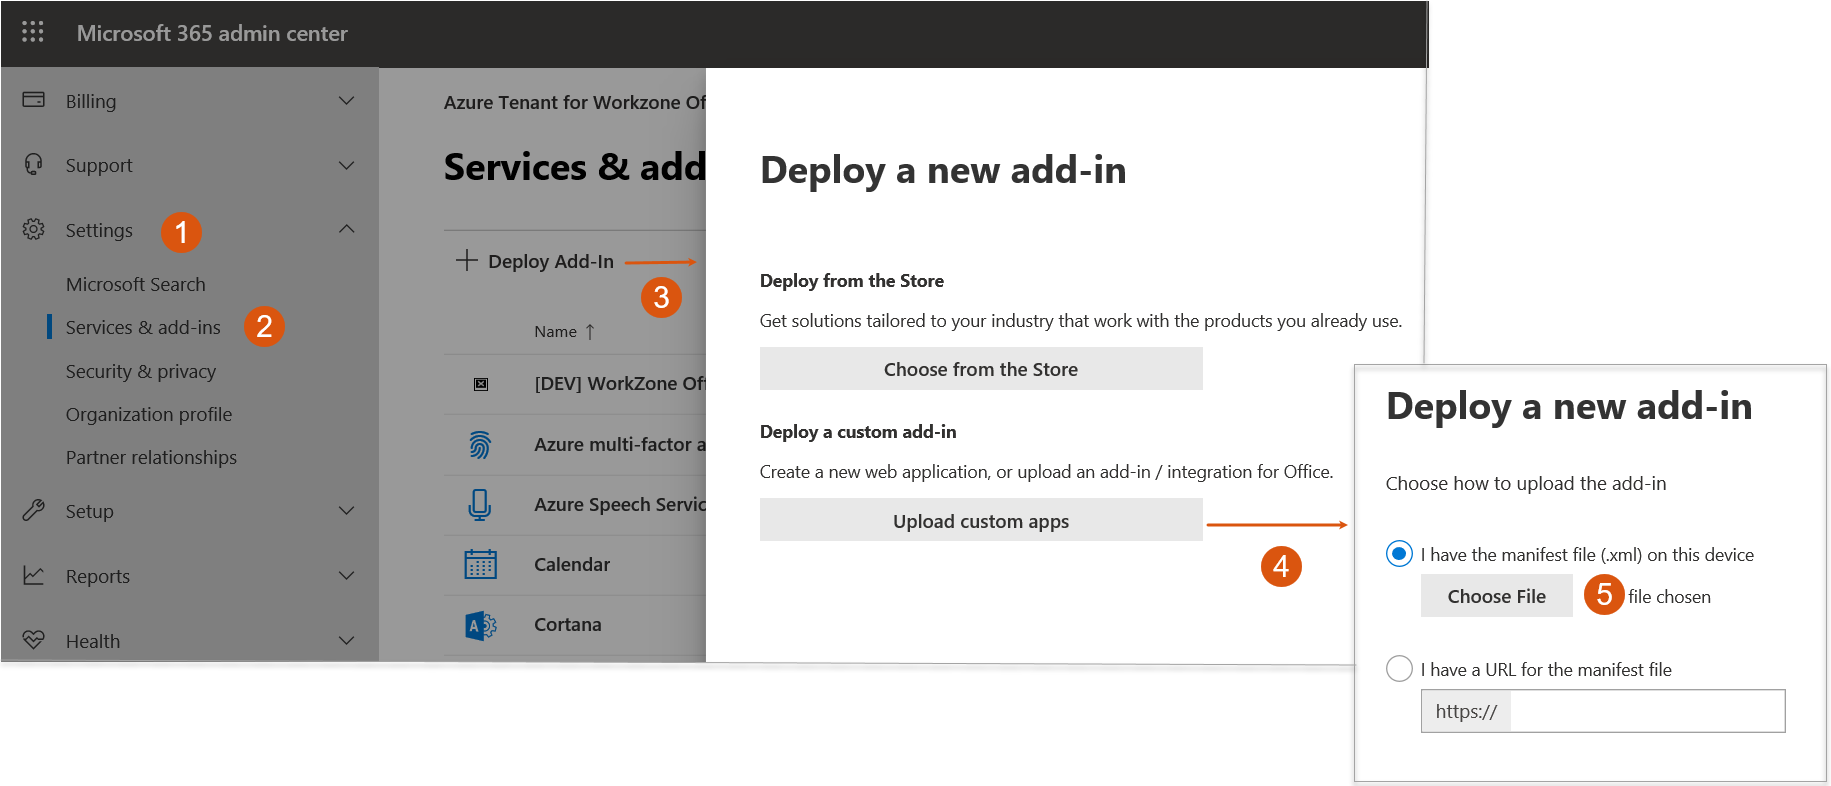
If you have access to the Microsoft admin center, use the standard Microsoft guidance to deploy WorkZone 365 for Office 365. See Deploy an Office add-in using the admin center.
Use command line
You can use Microsoft PowerShell to deploy WorkZone 365 for Office 365. To do this, follow the standard Microsoft guidance. See Use the Centralized Deployment PowerShell cmdlets to manage add-ins.
Note: By default, WorkZone 365 is disabled after the installation. You can enable it in WorkZone Configurator. To do this, go to Global > Feature settings > WorkZone 365 , select the needed products, and click Save.
Install WorkZone 365 to use meetings in Microsoft Outlook 2016 and 2019
MeetingManifest.xml manifest and add it to a shared folder.
To share a folder, right-click it, select Properties > Sharing > Share. Add yourself and users and/or groups with whom you want to share WorkZone Meetings. Click Share.There are three installation options:
- via Microsoft Outlook web interface
- via Exchange Admin Center (EAC, web interface)
- via Microsoft PowerShell (command line). See Install add-ins for Outlook for your organization in Exchange 2013 (the article guidelines also apply to Exchange 2016 and 2019 versions).
Use Outlook web interface
- Start Outlook.
- Click File.
- Click on the link under Account settings to start OWA.
- Login into OWA with your Outlook credentials.
- Click on the gear icon on the right side.
- Click Manage add-ins > Add from a file.
- Click Browse and provide location for the shared folder with the
MeetingManifest.xmlmanifest file. - Select the
MeetingManifest.xmlfile, and click Open. - Click Next > Install > OK.
- Go back to Outlook > Calendar, and create a new meeting. The WorkZone 365 Meeting button will be visible in the navigation ribbon.
Upgrade WorkZone 365
- If you are upgrading from earlier versions, uninstall the old version of WorkZone 365 before installing the new version.
- Download and adjust the manifests, as described in Download manifests and Adjust the MeetingManifest.xml.