Custom fields

|

|

|

|
|
Case |
Document |
Contact |
Address |
About custom fields
Along with the default WorkZone fields, you can define custom fields that are specific for your organization. You can add, edit, and delete custom fields for cases, documents, contacts and addresses. Custom fields can store one value per case, document or contact and can be displayed on the detail pages for cases, documents and contacts as well as added to the case, document and contact lists.
Custom field types
When you create a custom field, you must define the custom field type. The custom field type determines what kind of data the field can store and how the input is interpreted.
There are 13 types of custom fields: text, unique, date, address, contact, employee, unit, case, document, custom type, decimal, integer, and droplist.
| Data type | Description |
|---|---|
|
Text |
Any characters including numbers can be entered and are considered text and not numbers. The content of this field cannot be used for subsequent calculations but can be validated using validation rules. |
|
Unique |
Any characters including numbers can be entered and are considered text and not numbers. The field will only accept unique values. |
|
Date |
A set of integers that are interpreted as a date. Values that cannot be interpreted into a date format cannot be entered. When selecting Date data type, a date selector will automatically be added to the field to enable a user to open a calendar-like form and select the date. |
|
Address |
Custom field value registered in the database as an Address. |
|
Contact |
Custom field value registered in the database as a Contact. |
|
Employee |
Custom field value registered in the database as an Employee. |
|
Unit |
Custom field value registered in the database as an Organizational unit. |
|
Case |
Custom field value registered in the database as a Case. |
|
Document |
Custom field value registered in the database as a Document. |
|
Custom type |
Custom type value registered in the database as a Custom type. |
|
DateTime |
A set of integers that are interpreted as a date and time. Values that cannot be interpreted into a date and time format cannot be entered. When selecting the DateTime data type, a date and Time selector will automatically be added to the field to enable a user to open a calendar-like form , select the date and enter a time. |
|
Decimal |
All numbers, including fractional elements of a number. Negative values can be used. |
|
Integer |
All numbers, excluding fractional elements. Negative values can be used. |
|
Droplist |
A list of predefined values a user can chose from. Custom droplists can be created and maintained in Global > Custom Droplists. |
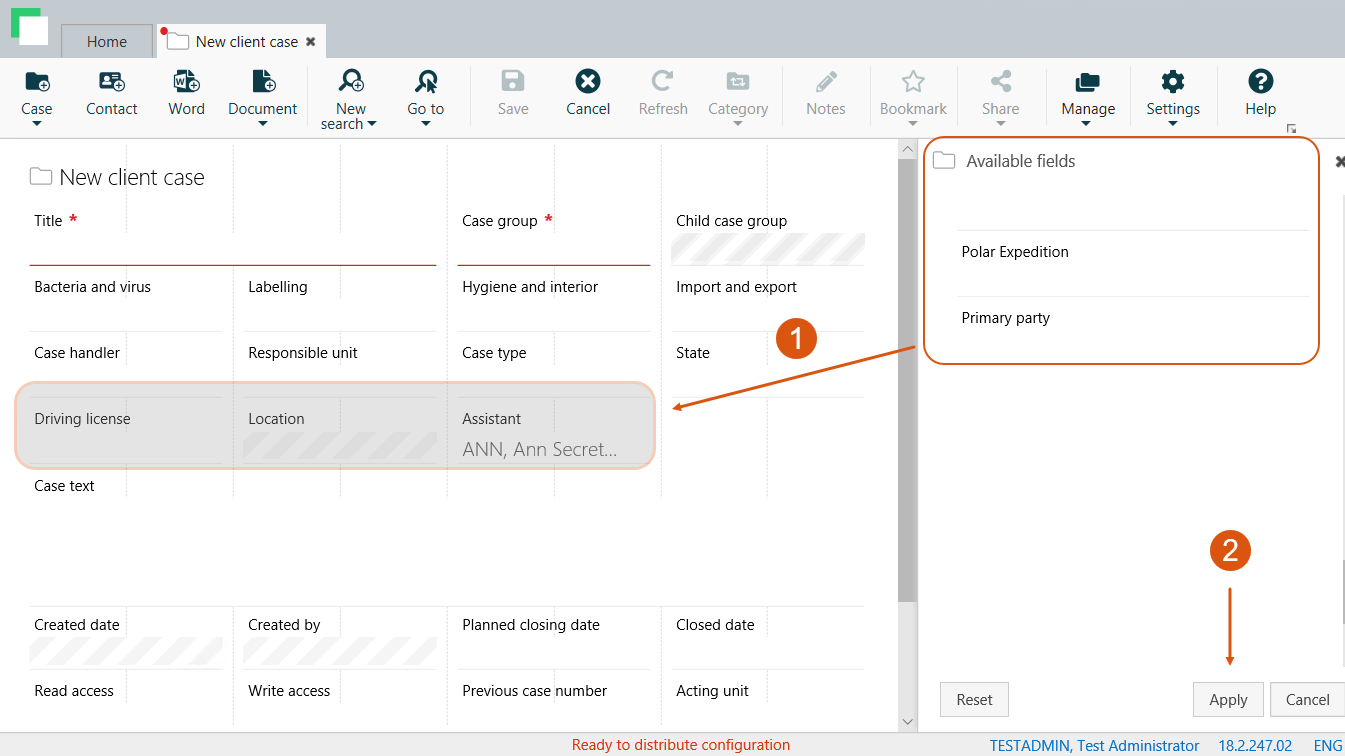
In the following example, Driving license, Location and Assistant are custom fields. An administrator adds them from the Available fields list.

About case custom fields
In contrast with Document and Contact custom fields, Case custom fields are divided on two tabs:
- Primary – These custom fields are available everywhere where you can add case custom fields.
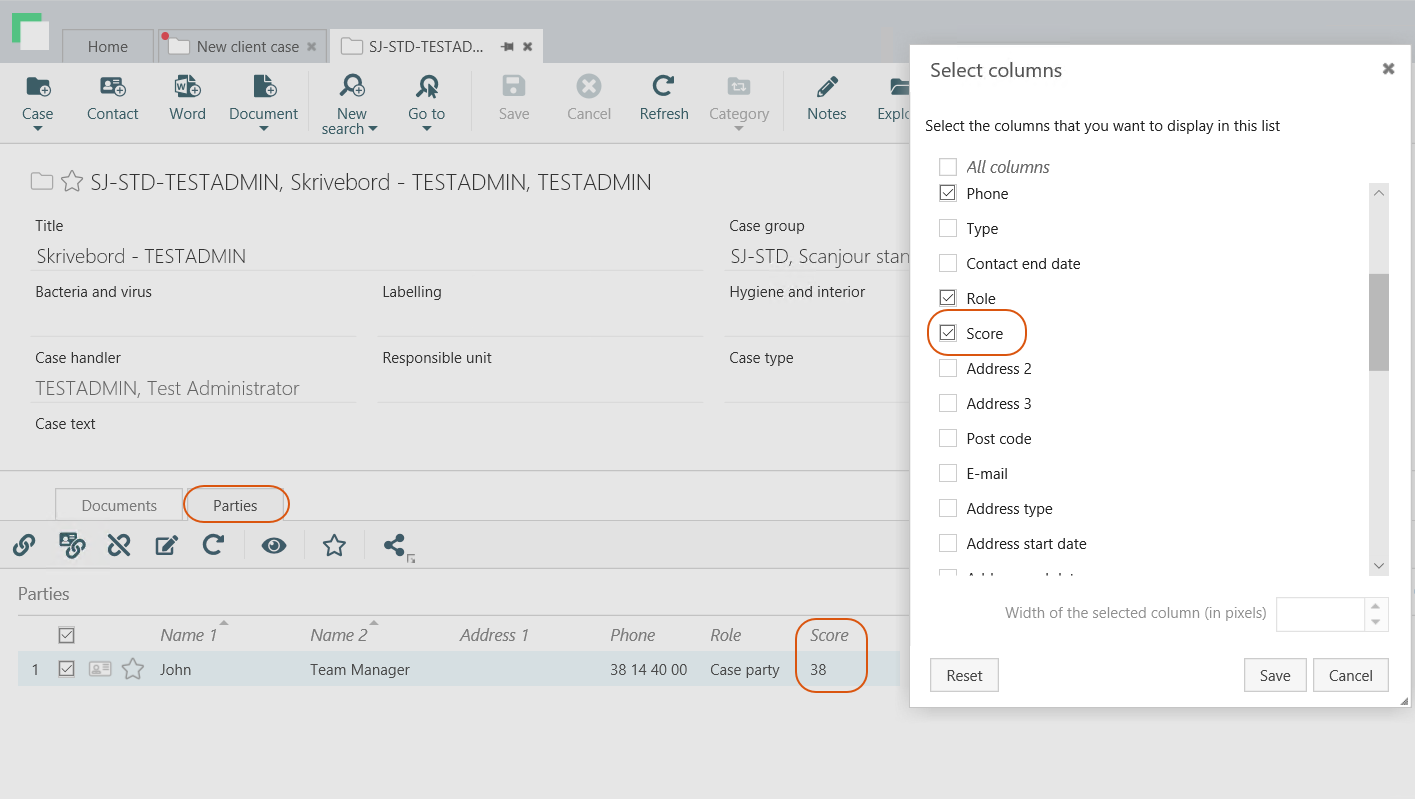
- Case parties – These custom fields are only available on the Parties tab on cases. Use these fields to define additional content that connects a specific case with a specific contact. To see a custom field in WorkZone Client, right-click the table headings and add a new column.

Create a custom field
Create a custom field to make it available for the WorkZone Client users.
- On the main page, select Case, Document, Contact, or Address depending on where to you want to add a custom field.
- On the Custom fields tab, in the right bottom corner, click
Create. The Create custom field dialog box opens.
- Fill in the following fields to define properties of the custom field:
- Label by default – Default name that is visible for users.
- Code – The name of the custom field as it is registered in the database. The value in the Code field must be 11 characters or less.
- Localize labels – Optionally, specify names in other languages.
- Type of field – Data type for this field:
- Text – string values;
- Validation rule – Optionally, you can associate the custom field with the validation rule. The validation rule defines required text format. See how to configure validation rules.
- Date – date values;
- Decimal – floating-point numbers;
- Integer – whole numbers;
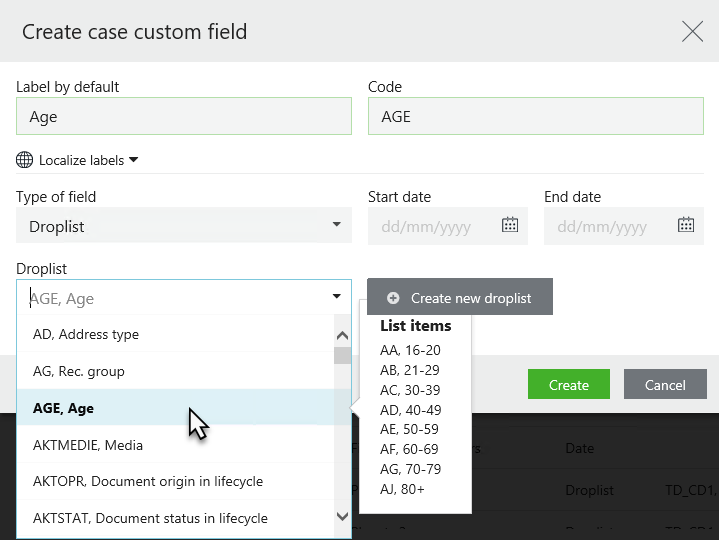
- Droplist – multiple values:
- Select droplist – Select a droplist of a desired category. To view list items that are included in a list, point to the list name. See how to configure custom droplists.
- Create new droplist – Click the button if you want to create a custom droplist that is relevant to your organization. You will be redirected to the Custom droplist page.
- Address – custom field value registered in the database.
- Contact – custom field value registered in the database.
- Employee – custom field value registered in the database.
- Unit – custom field value registered in the database.
- Case – custom field value registered in the database.
- Document – custom field value registered in the database.
- Text – string values;
- Start date – The date when the custom field becomes active. Before the start date, the custom field is invisible in the user interface.
- End date – The date when the custom field is deactivated. After the end date, the custom field becomes invisible in the user interface (but it can still be looked up and viewed in WorkZone Client as read-only).
- Selectable - When this option is disabled, the custom field becomes invisible and unsearchable in the WorkZone Client user interface, disregarding its start and end dates. This can be used, for example, for storing data that is not relevant to WorkZone Client user interface.
- Click Create.

Edit a custom field
- Open a list with the custom field that you want to edit and point to the field. A menu bar with action buttons appears.
- Click
Edit.
- Apply the required changes in the Edit custom field dialog box.
Note: You cannot edit the Label by default, Code and Type of field values.
- Click Save.
Delete a custom field
- Open a list with the custom field that you want to delete and point to the field. A menu bar with action buttons appears.
- Click
Delete and then click Delete.
