You can merge WorkZone case, document, or contact information into a Microsoft Word document.
First you will need to create a template with relevant merge fields (content controls). A merge field is an information field of a case, document, or contact (party). For example, (Case, Case handler) Name 1, (Document) Title, and so on. When you merge a template with a specific case or document, merge fields will be auto-filled with relevant values from that case or document. For example, (Case, Case handler) Name 1 will receive the value Ann, (Document) Title will receive the value Application form, and so on.
You can add merge fields for the following values:
- For cases: Case, Case handler, Responsible unit, Acting unit, and case custom fields.
- For documents: Document, Case handler, Responsible unit, Acting unit, and document custom fields.
- For case parties and document parties: Address 1, Address 2, Address 3, Contact number (code), Contact number (text), Country (code), Country (text), Country name, E-mail, Fax, Job title, Mobile phone, Name 1, Name 2, Post code (code), Post code (text), Post district, and contact custom fields.
Custom fields for cases, documents, case parties, and document parties are set up by administrators in WorkZone Configurator under Case > Custom fields, Document > Custom fields, and Contact > Custom fields. See WorkZone Configurator Guide for more information.
- After adding a merge field to a Word template, you will see the placeholder text (title format) for this field. This can help you visualize the existing merge fields, as well as detect any unmerged yet values.
- Upon hovering over a merge field, you will see its most important details. For example, for a merge field Address 1 added for Case > Responsible Unit, a tooltip might say "(Case, Responsible Unit), Address 1".
This can help you easily identify the needed merge field, as well as to distinguish between fields with similar values. Tip: Tooltips for merge fields can be updated by WorkZone administrators. See WorkZone 365 Developer Guide.
Add merge fields to a document
You can add or edit the existing merge fields at any time.
- In a Word document, open the WorkZone pane.
- Fill in mandatory fields on the Document tab.
- At the bottom of the WorkZone pane, select ... > Merge fields.
- On the Insert merge field tab, find the needed merge field and click [+]. The selected field will be added to the document.
- Click Save.
Merge information to a non-WorkZone document
- In a Word document with the inserted merge fields, open the WorkZone pane.
- Fill in mandatory fields on the Document tab.
- At the bottom of the WorkZone pane, click
 > Save and Merge.
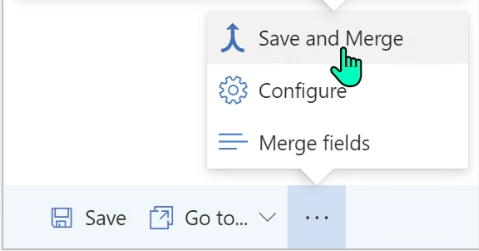
A copy of this document will be saved to WorkZone and the merge will start. Once the merge is complete, the saved WorkZone 365 document will automatically open in Word.
Merge information to an existing WorkZone document
- In a Word document with the inserted merge fields, open the WorkZone pane.
- Fill in mandatory fields on the Document tab.
- Click > Merge. The merge will start.
Merge information and save a copy of an existing WorkZone document
You can save a copy of an existing WorkZone document with the inserted merge fields as a new WorkZone document.
- In a Word document with the inserted merge fields, open the WorkZone pane.
- Edit the mandatory fields on the Document tab as needed.
- Click > Merge > Merge as Copy.
- A copy of this document will be saved as a new WorkZone document, and the merge will start.