Set up third-party integrations in Azure
To configure a third-party app to integrate with WorkZone, you need first to register the third-party app in your Entra tenant, and then configure the access to WorkZone in WorkZone Configurator. This topic describes how to set up integration accounts in Azure Portal and get the information that you to need to configure the integration in WorkZone Configurator. The third-party app SnapLogic is used as an example in the procedure below.
Set up an integration account in Azure
-
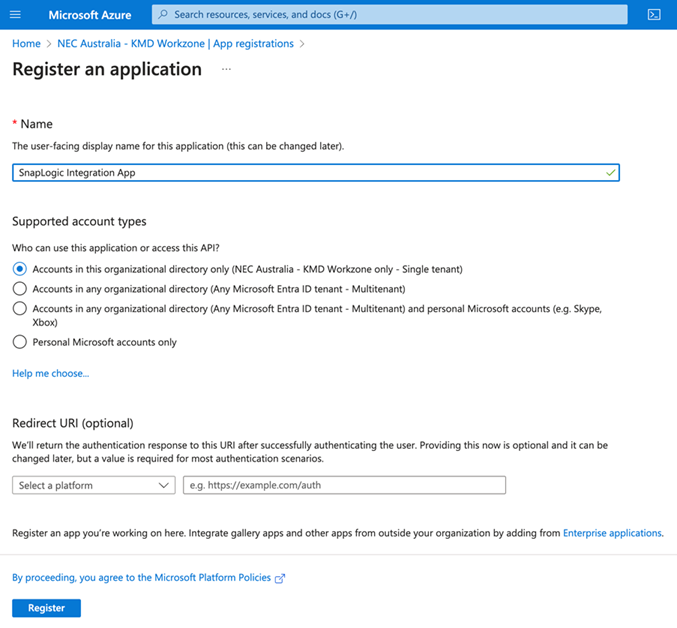
In your Entra tenant, go to App registrations and create a new app registration. You only need to fill in the name of the app, and then click Register.
-
Go to Certificates & secrets. Add a client secret, and click Create.
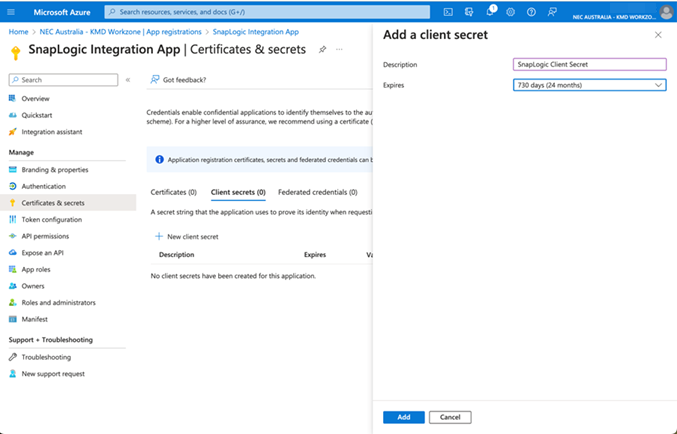 Important: Immediately after clicking Create, copy the client secret and paste it to, for example Notepad, as you will need it later. This is the only time that the client secret is shown. If you do not copy it right away, then you have to create a new client secret.
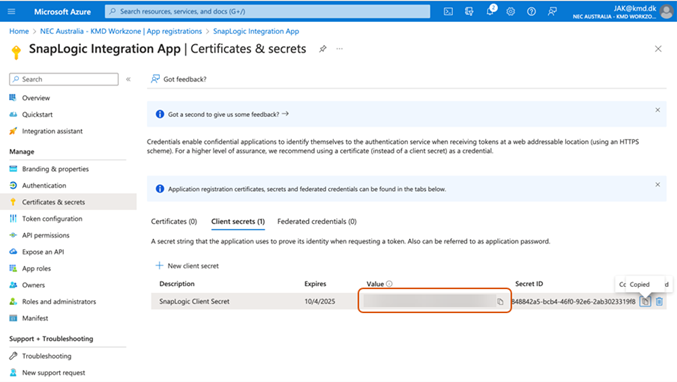
-
Open the WorkZone App registration, go to Expose an API, and then add a client application to apply the newly created app registration to WorkZone.

-
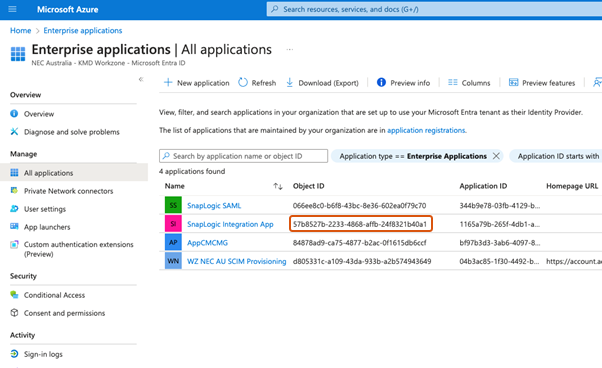
In WorkZone Configurator, go to Global > OAuth Settings > Integrations to set up the OAuth integration. Follow the steps in the WorkZone Configurator guide (Integrations tab). Enter the newly created object ID for the corresponding enterprise application in the Object ID field.

Go Enterprise applications > All applications to see the object ID for the app registration, in this example SnapLogic app.
-
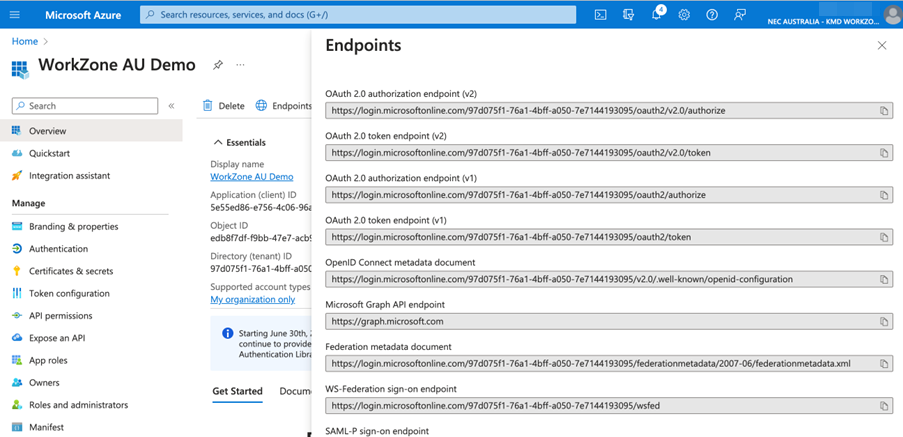
Note down the Client ID, the Tenant ID, the Client Secret from before (see step 3), the OAuth2 endpoints and the WorkZoneApplication ID URI (both which can be found on the App Registration for WorkZone).
Oauth2 endpoints:
Application ID URI:

Example: SnapLogic settings for a WorkZone OData account
