Set up security and access from mobile devices
To secure the access to the WorkZone Mobile web services that are used by WorkZone Mobile, it is recommended to configure conditional access, which will only allow access from compliant mobile devices.
Log in to the Microsoft Azure portal.
Create a new policy
- Click Azure Active Directory on menu, or use search to find it easily.
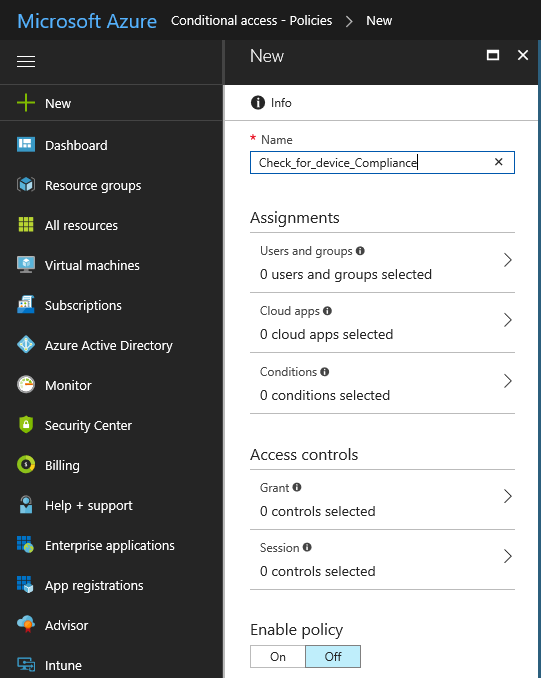
- Under Security, click Conditional Access > New policy.
- Enter a name of the policy in the Name field. In the example below, the policy is named Check_for_device_Compliance.
- Under Assignments, click Users and groups. Select All users on the Include tab and click Done. This ensures that all users will be checked.
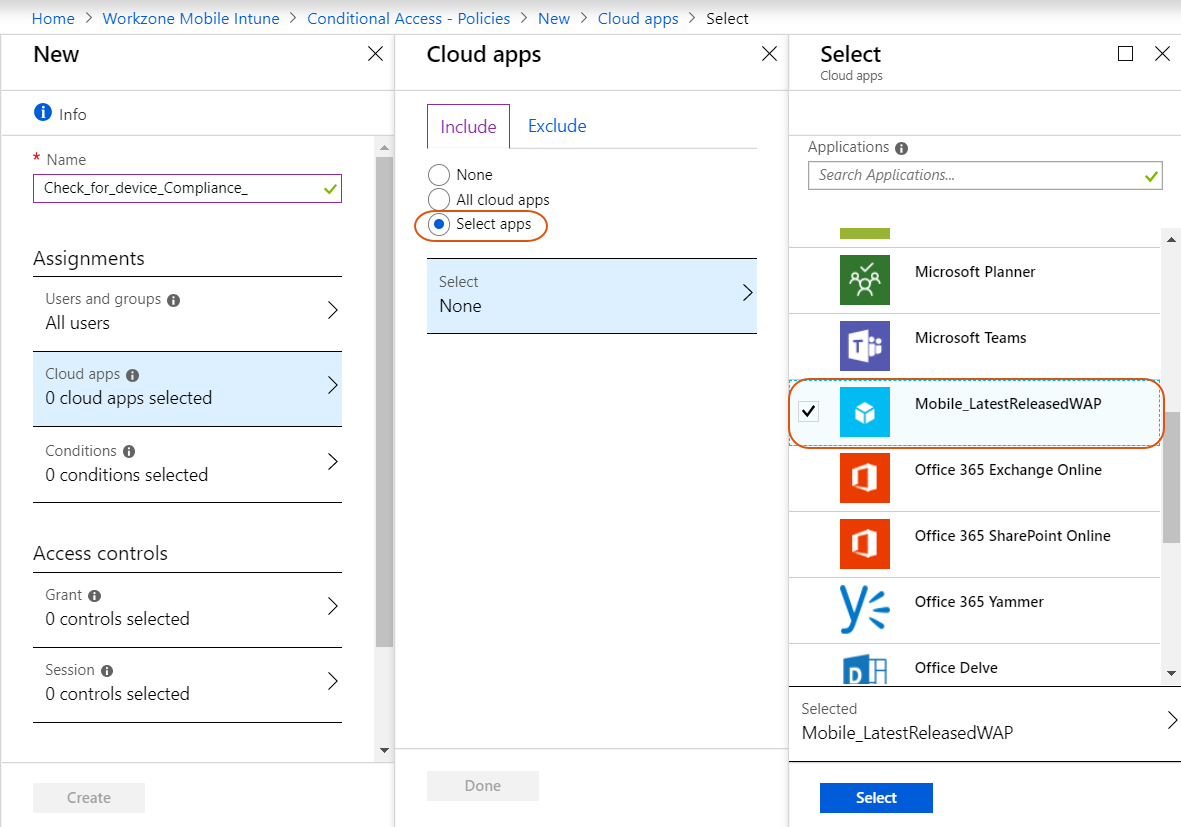
- Click Cloud apps, and click Select apps on the Include tab.
- Click Select to expand the list of applications. Select the WorkZone Mobile app that you have created earlier. Click the Select button and then click Done.
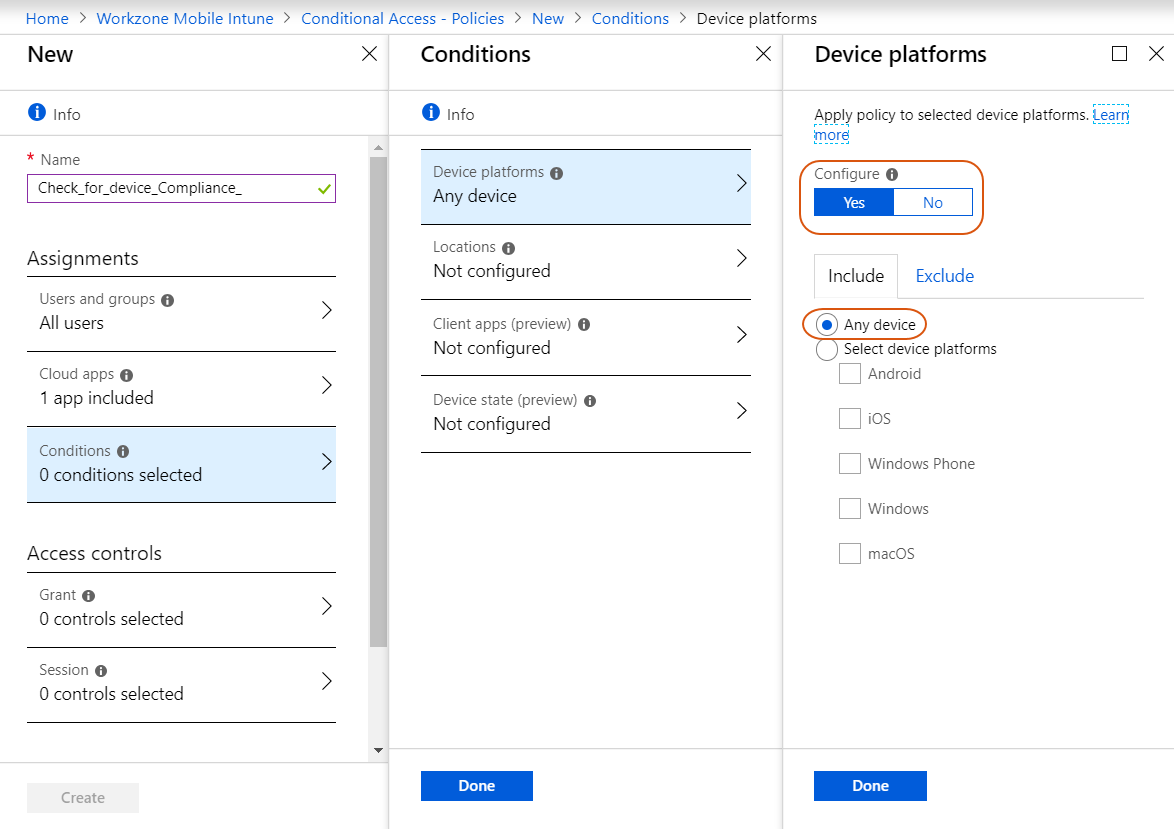
- Click Conditions > Device platforms, and click Yes to enable Configure.
- Select Any device and then Done. This ensures that all platforms will be checked.
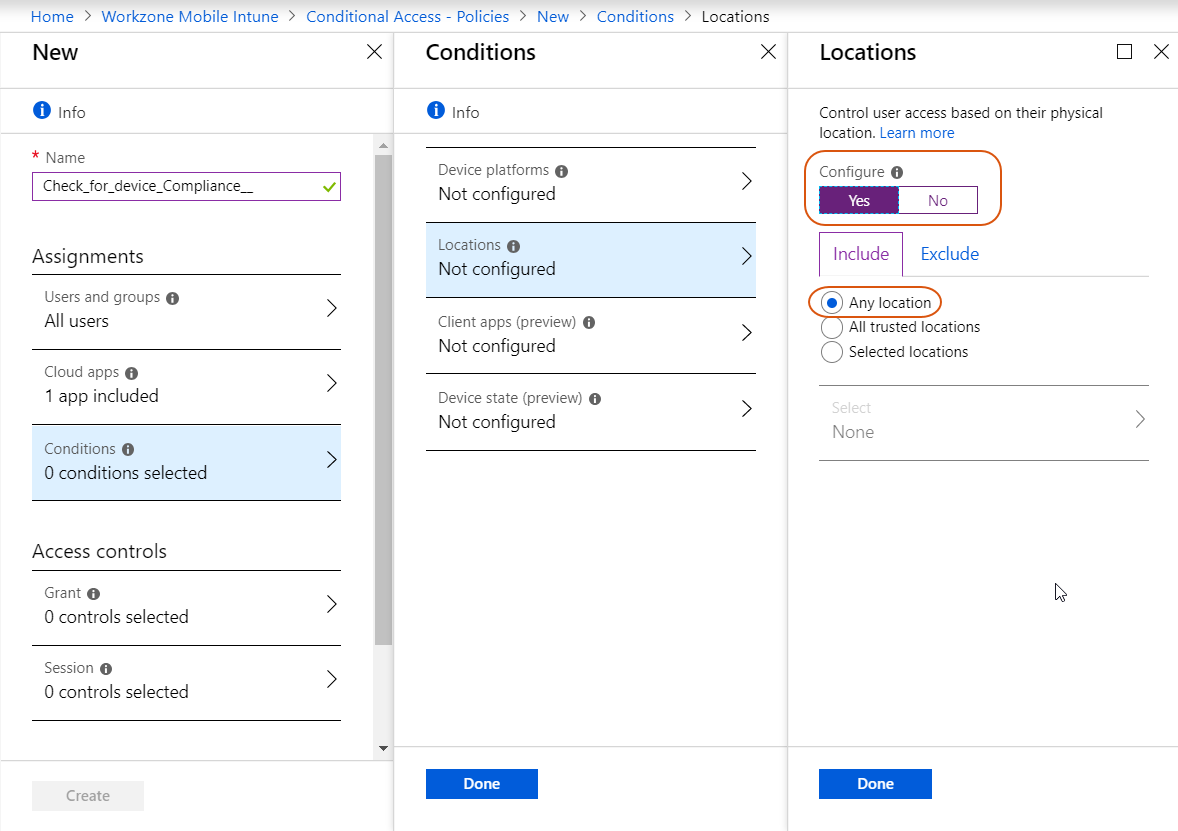
- Click Locations and click Yes to enable Configure.
- Select Any location on the Include tab and click Done. It ensures that all locations will be checked.
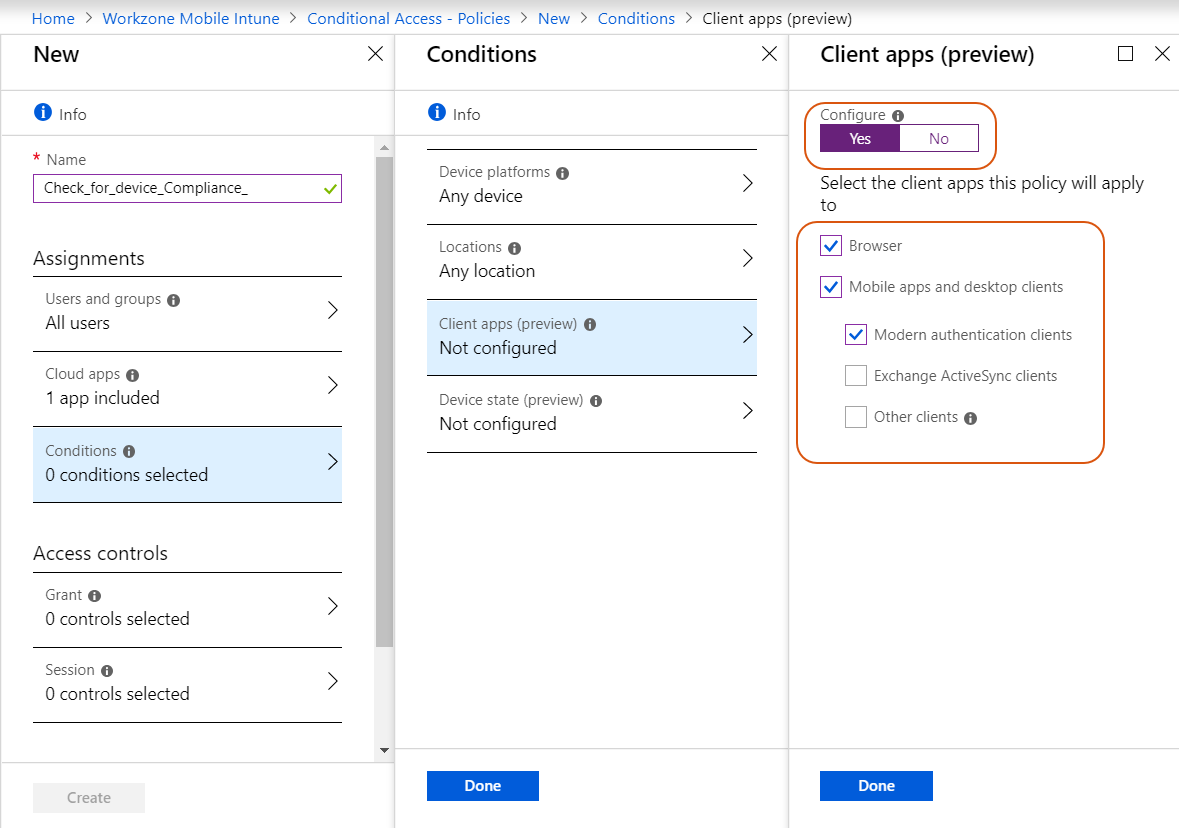
- Click Client apps, and click Yes to enable Configure.
- Select Select client apps, and then select the Browser, Mobile apps and desktop clients, and Modern authentication clients check boxes. Click Done.
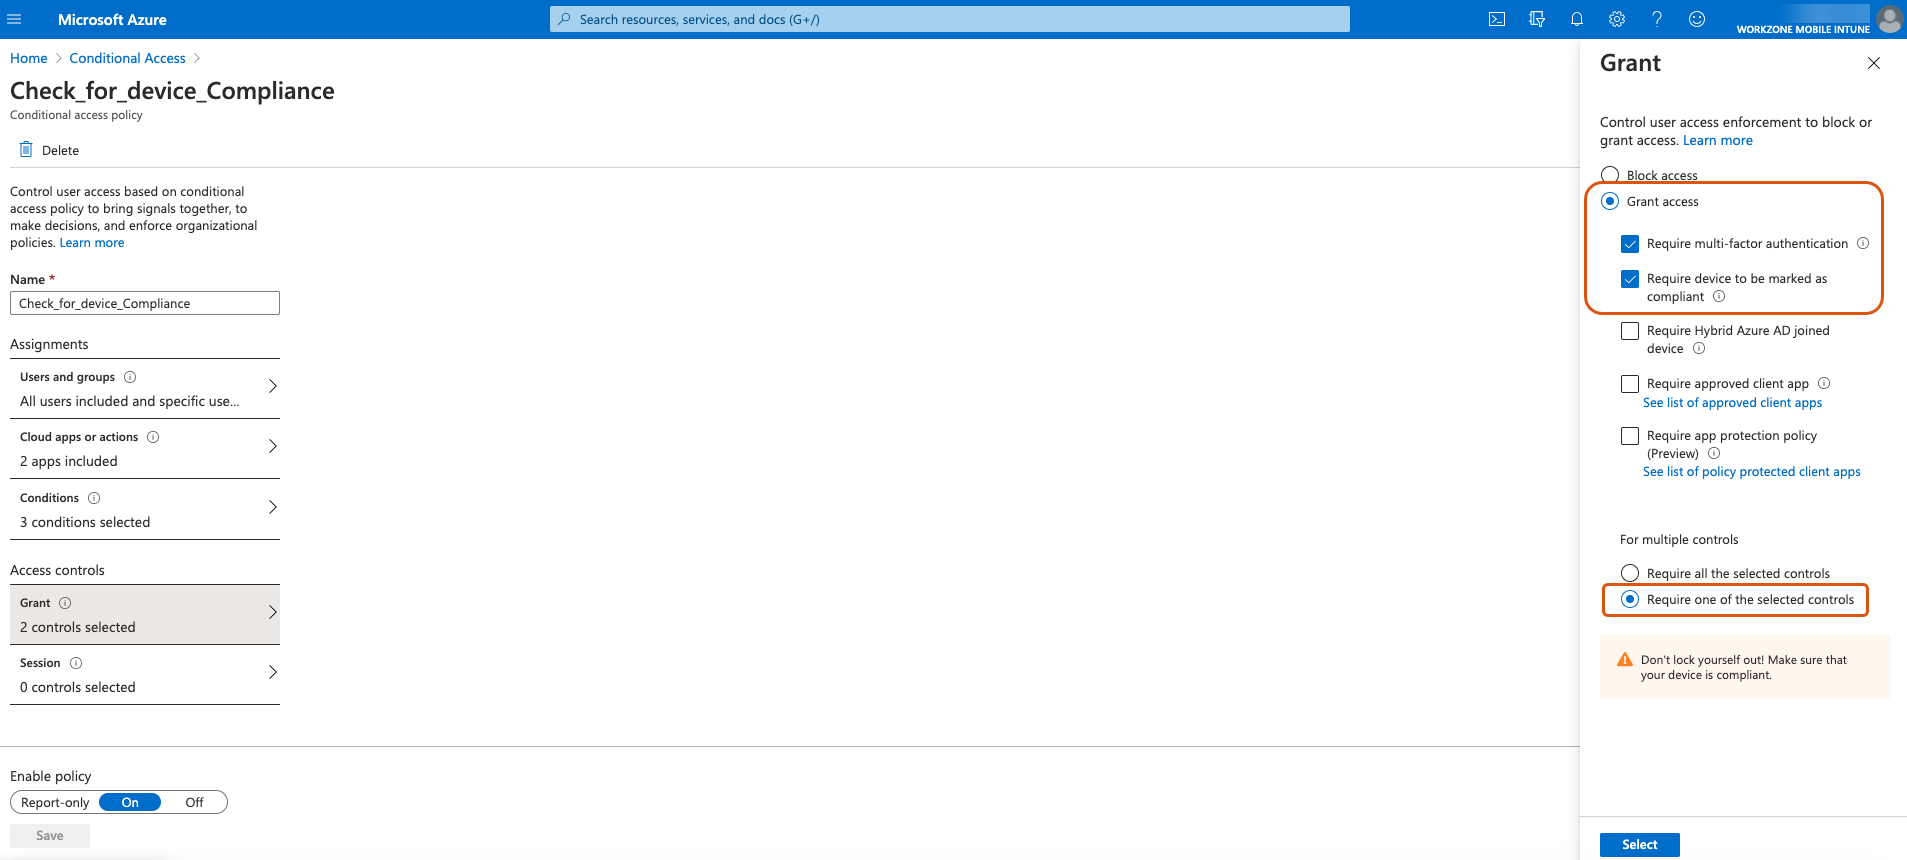
- Under Access controls, click Grant and then select Grant access.
- Select the Require multi-factor authentication and Require device to be marked as compliant checkboxes. For multiple controls, select the Require one of the selected controls option. Click Select.
- Click On to enable the policy and then Create. The created policy now appears as Enabled.


Set up multi-factor authentication
- Go to https://aka.ms/mfasetup.
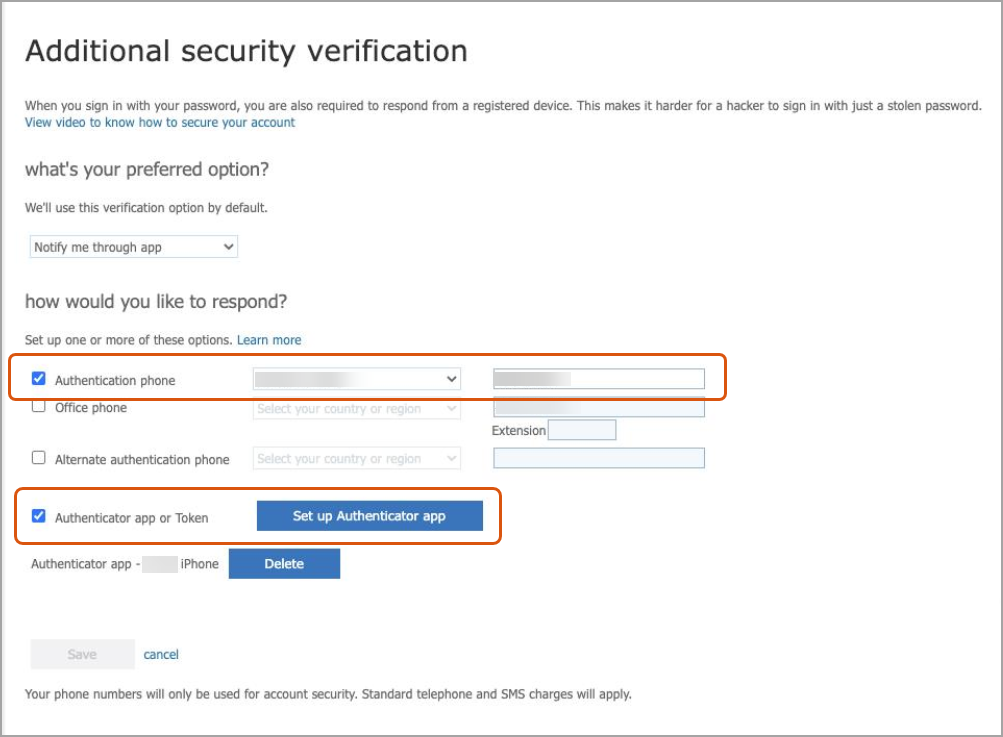
- On the Additional security verification page, under Set up one or more of these options, select the Authentication phone checkbox and enter your phone number to use for authentication.
- Select the Authenticator app or Token checkbox.
- A QR-code will appear on the screen. Scan it with your mobile device using the Authenticator app.
- If your account is already added to the Authenticator app, select it from the app.
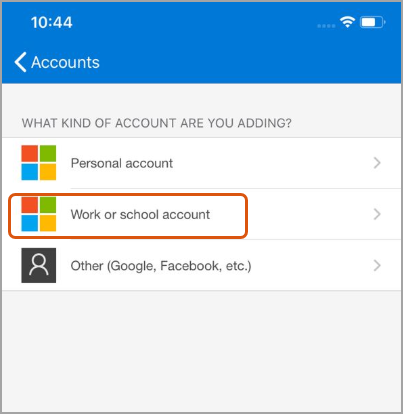
- If you account is not added to the Authenticator app yet, add it. Under What kind of account are you adding?, select Work or School account.
-Or-
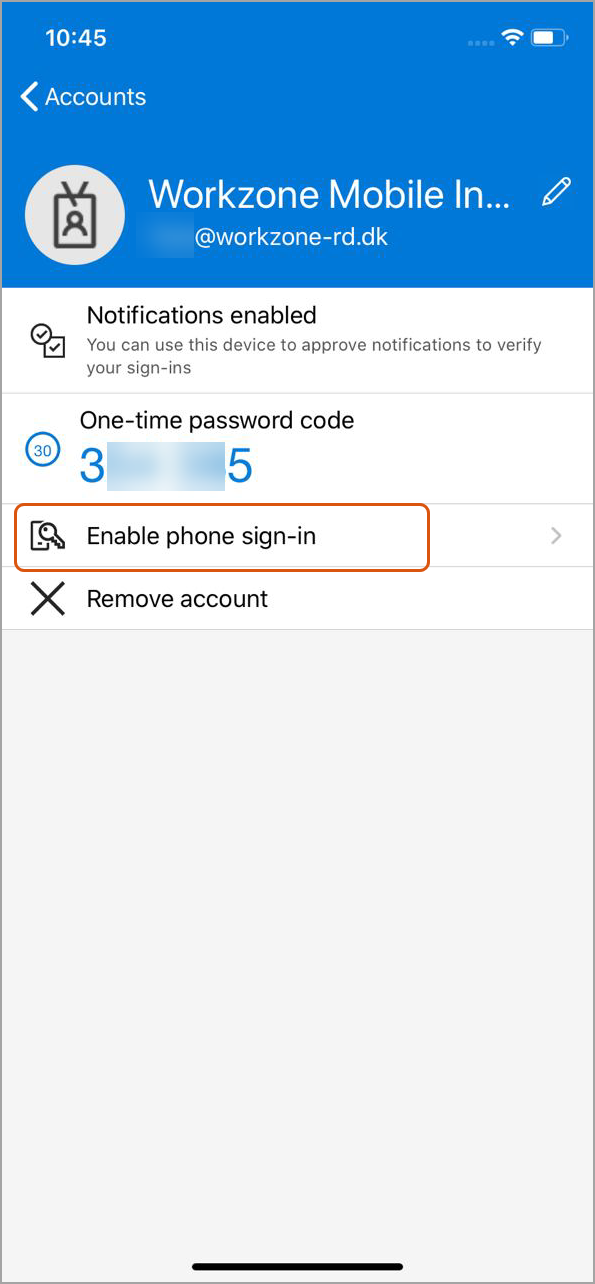
- After you have scanned the QR-code, your account with be displayed with the single sign tokens.
- To simplify logging in, select Enable phone sign-in. This will allow you to log in using Face ID or TouchID, instead of entering the log-in codes.
Log in to edit the Office documents
Before you start editing Office documents, you will need to confirm your login.
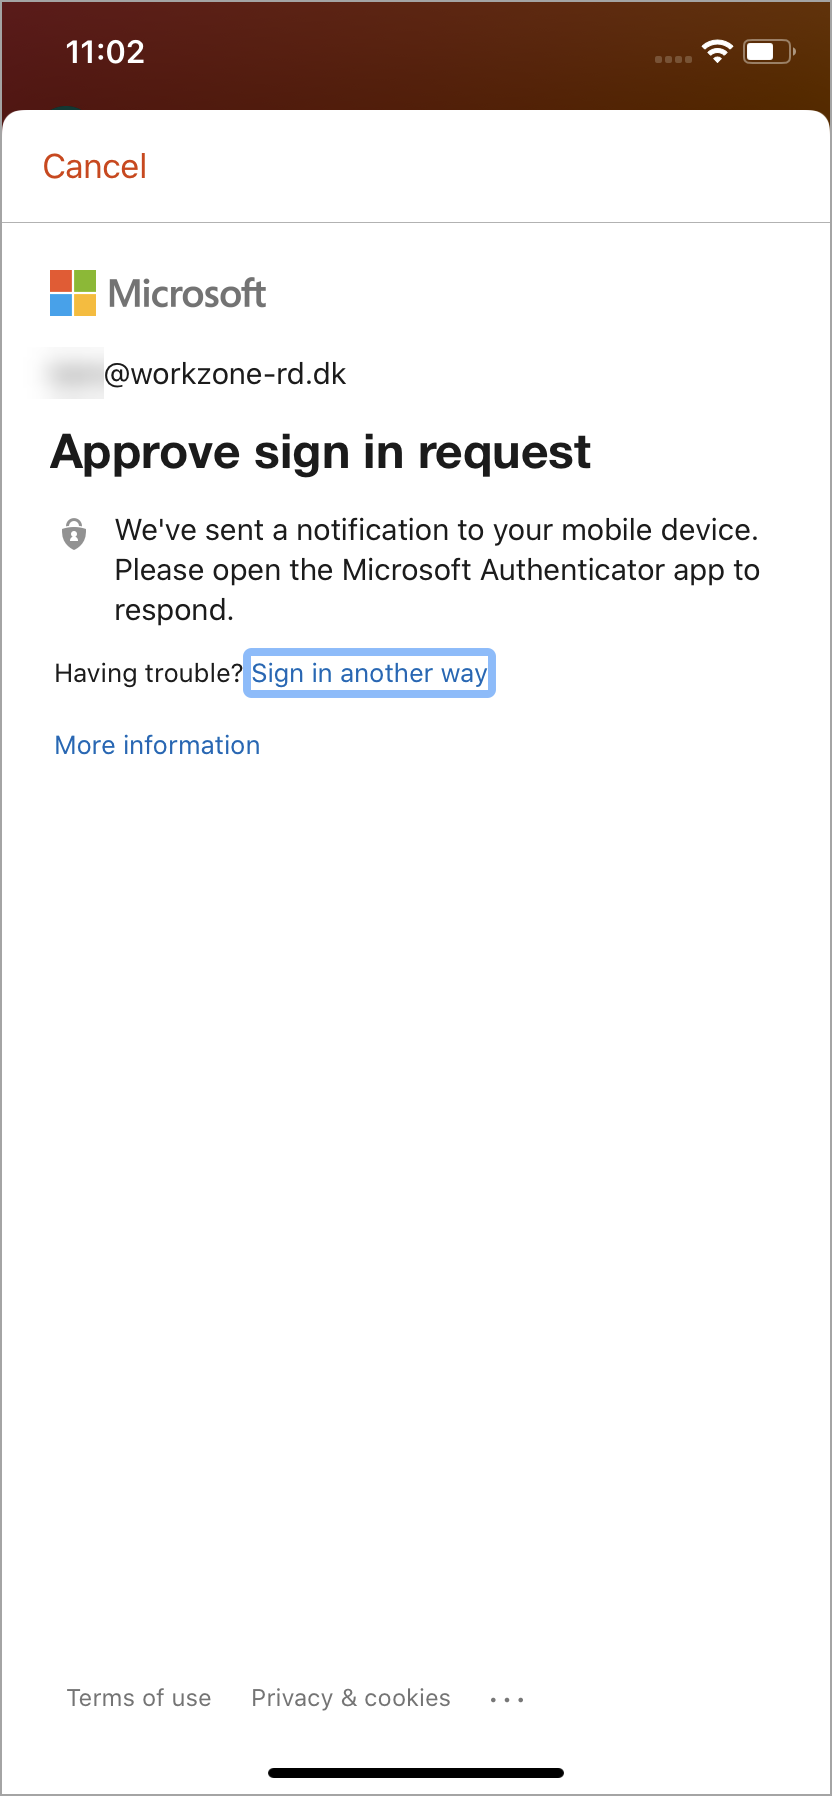
- After entering you user name and password, confirm your login via previously selected option: by phone, authentication code, Face ID or Touch ID, or notification code in the Authenticator app.
- After logging in, you can select to remain logged in all the time. In this case your login will be remembered during your next sessions (by default, your login will be remembered for 90 days, but this period can be changed during the initial setup of the Intune environment).
