Deploy WorkZone Integration Platform
The WorkZone Integration Platform is an online tool that you can use to create integrations between WorkZone and external systems. The WorkZone Integration Platform uses SnapLogic tools for connecting cloud data sources. The WorkZone Integration Platform is available on the Public and EU-Cloud, however, it is not accessible to customers who operate in air-gapped environments.
To learn more about SnapLogic and deployment, see Deploying a Groundplex in Kubernetes in the SnapLogic documentation.
This page describes how to set up SnapLogic to integrate with WorkZone and synchronize data.
Prerequisites
Before deploying the WorkZone Integration Platform, ensure that your environment meets the following prerequisites :
-
SnapLogic portal
Ensure access to the SnapLogic portal for the EMEA region (Europe, the Middle East, and Africa). You need an active account and an individual project on the SnapLogic portal.
Go to https://cdn.emea.snaplogic.com/sl/designer.html# to access the SnapLogic portal for the EMEA region.
-
SnapLogic image
Ensure that the SnapLogic image is available in all the required ACR (Azure Container Registry) tenants.
-
Memory and CPU per JCC (Java Component Container) node
-
Memory: 3Gi
-
CPU: 1100m
-
-
Deployment in KMD EU Cloud
If you deploy SnapLogic in KMD EU Cloud, order the following should at KMD Cloud Center of Excellence (CCoE) for each environment where SnapLogic will be installed (SnapLogic should only be installed in production unless otherwise specified).
Allocate one node of the type DS3_v2 (2 vCPU, 16GB RAM).
Note: If you plan to use the SnapLogic instance towards other environments outside the AKS cluster where SnapLogic is installed, ensure that the necessary firewall openings are in place.If you deploy in KMD EU Cloud, order the following at CCoE for each environment that SnapLogic should be able to communicate with:
-
Source and destination environment/protocol and port: HTTP/HTTPS 80/443 between <company name>.test.workzone.cloud and <insert company namer>.workzone.cloud
-
Creating a Snaplex
-
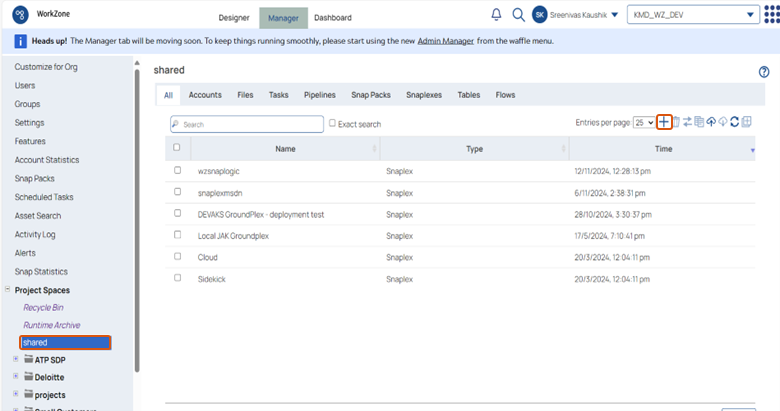
In the SnapLogic portal, go to the shared folder, and click + and select Snaplex.
-
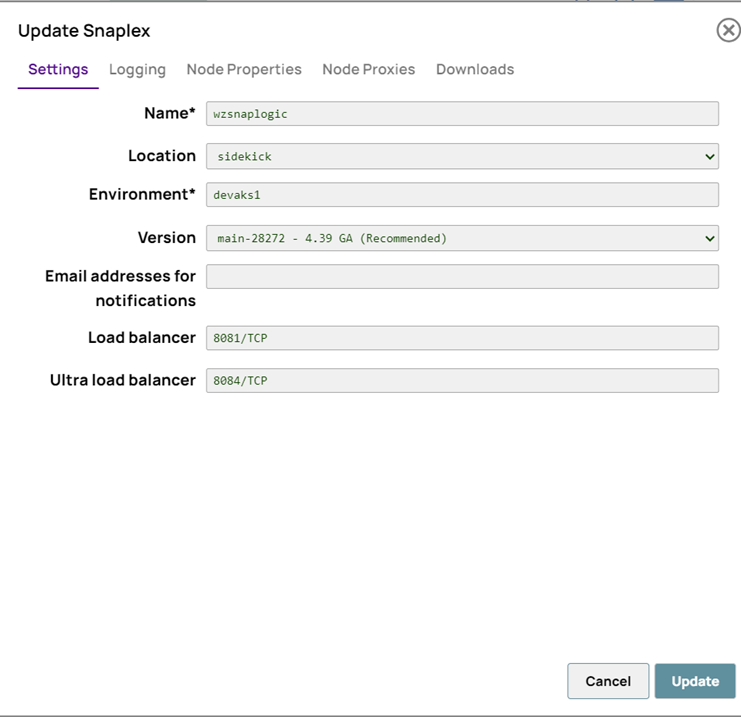
Fill in the required field as shown below.
Deploy SnapLogic Groundplex in AKS
-
In the Azure portal, open Cloud Shell and create a new directory for SnapLogic.
-
Run the command below to download the Helm charts.
wget https://docs-snaplogic.atlassian.net/wiki/download/attachments/855836057/helm_chart_v2.zip?api=v2 -
Unzip the Helm chart:
unzip helm_chart_v2.zip\?api\=v2 -
Run the curl command below to get the config link url:
curl -u <userid> https://{controlplane_path}/api/1/rest/public/snaplex/config/{plex_path}? {query_parameters} -
Open the SnapLogic Control Plane: elastic.snaplogic.com. To open either the UAT (User Acceptance Testing) Control Plane or the EMEA Control Plane, substitute the name for
elastic.UAT Control Plane: uat.snaplogic.com.
EMEA Control Plane: emea.snaplogic.com.
-
Specify the plex path. The syntax for building the SnapLogic plex path is:
Plex_path Format: = /{env_org}/{project_space}/{project_name}/{snaplex_name}Use the query parameters = Expire_hours or Version.
For example:
curl -u ftf@kmd.dk https://cdn.emea.snaplogic.com/api/1/rest/public/snaplex/config/KMD_WZ_DEV/shared/wzsnaplogic?expire_hours=336 -
You will be asked to enter password to log in to the SnapLogic portal and get your specific control_plane path. Enter the password for the SnapLogic account.
-
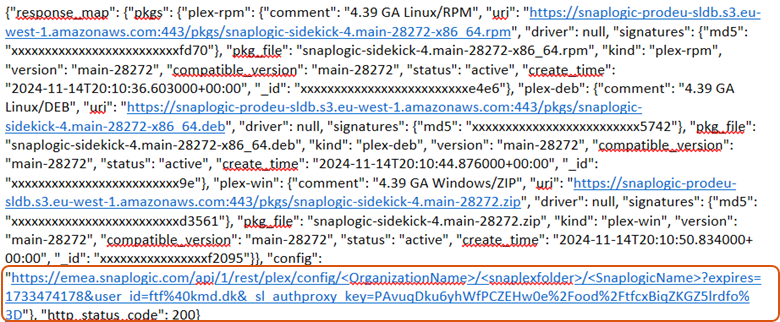
The response from the above curl command would look something like the example below, but you only need the config link from the response.
-
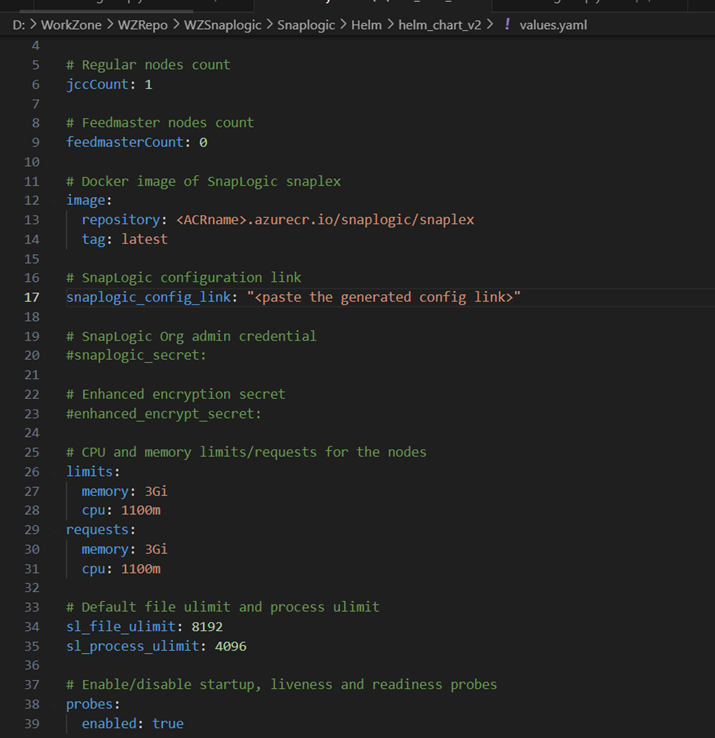
Change the directory to helm_chart_v2 and open the values.yaml file with the command
“vi values.yaml “.Copy or download the file
 Values.yaml file.
		# Default values for snaplogic-snaplex.
# This is a YAML-formatted file.
# Declare variables to be passed into your templates.

# Regular nodes count
jccCount: 1

# Feedmaster nodes count
feedmasterCount: 0

# Docker image of SnapLogic snaplex
image:
  repository: snaplogic/snaplex
  tag: latest

# SnapLogic configuration link
snaplogic_config_link: https://emea.snaplogic.com/api/1/rest/plex/config/KMD_WZ_DEV/shared/wzsnaplogic?expires=1734330726&user_id=ftf%40kmd.dk&_sl_authproxy_key=dFdPVa9My9NoWyYO8OyY%2BUDuOZYupAc2C34OuOCP%2BJc%3D

# SnapLogic Org admin credential
#snaplogic_secret:

# Enhanced encryption secret
#enhanced_encrypt_secret:

# CPU and memory limits/requests for the nodes
limits:
  memory: 3Gi
  cpu: 1100m
requests:
  memory: 3Gi
  cpu: 1100m

# Default file ulimit and process ulimit
sl_file_ulimit: 8192
sl_process_ulimit: 4096

# Enable/disable startup, liveness and readiness probes
probes:
  enabled: true

# JCC HPA
autoscaling:
  enabled: false

  minReplicas:
  maxReplicas:

  # Average count of Snaplex queued pipelines (e.g. targetPlexQueueSize: 5), leave empty to disable
  # To enable this metric, Prometheus and Prometheus-Adapter are required to install.
  targetPlexQueueSize:

  # Average CPU utilization (e.g. targetAvgCPUUtilization: 50 means 50%), leave empty to disable.
  # To enable this metric, Kubernetes Metrics Server is required to install.
  targetAvgCPUUtilization:

  # Average memory utilization (e.g. targetAvgMemoryUtilization: 50 means 50%), leave empty to disable.
  # To enable this metric, Kubernetes Metrics Server is required to install.
  targetAvgMemoryUtilization:

  # window to consider waiting while scaling up. default is 0s if empty.
  scaleUpStabilizationWindowSeconds:
  # window to consider waiting while scaling down. default is 300s if empty.
  scaleDownStabilizationWindowSeconds:

# grace period seconds after JCC termination signal before force shutdown, default is 30s if empty.
terminationGracePeriodSeconds: 900

# Enable IPv6 service for DNS routing to pods
enableIPv6: false
-
Change the limits and request parameters according to the AKS configuration and specify the image that is available in the ACR.
-
Set the JCC node count as per the requirements.
-
Set the FeedMaster node count to 0.
-
Delete all the FeedMaster related files from the template.
-
Go back to the root directory and run the command below to install the Helm chart:
helm install snaplogic helm_chart_v2 --namespace workzone - -set-string snaplogic_config_link='<paste the config link>'The deployment is ready:
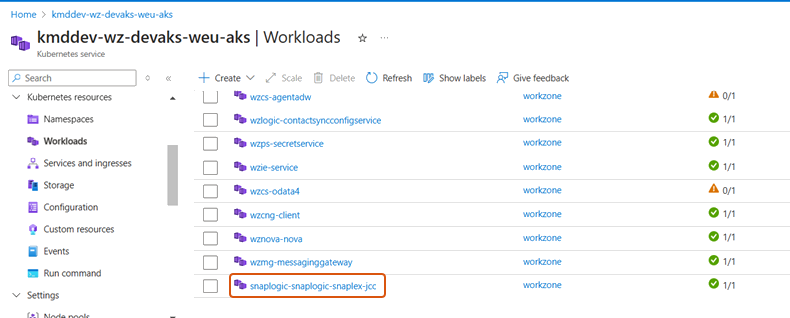
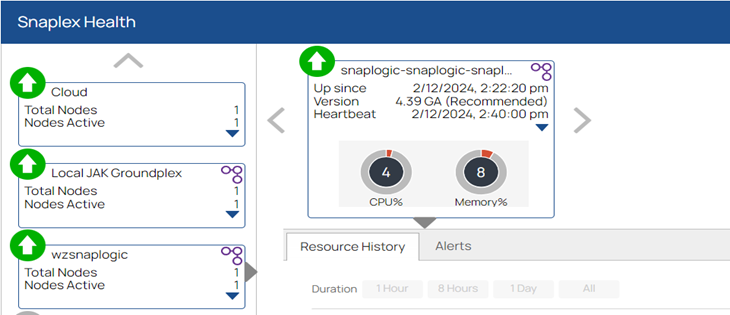
The JCC node should be up and running as shown below without any errors and alerts.
Test the Snaplex JCC node
To test if the deployed Snaplex JCC node works, you can go to the Designer tab and select any sample pipeline or build a pipeline as per the requirements. Select the required Snaplex against which you want to run the pipeline and click the Execute/Run button.
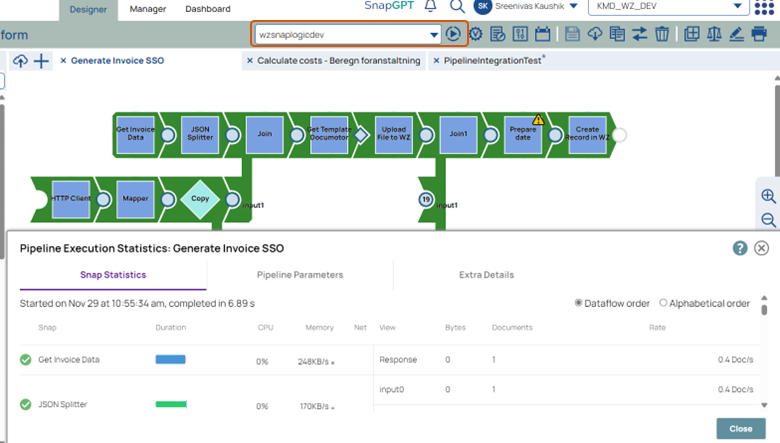
If the pipeline state is green, the deployment was successful and the data is being integrated.
Deploy the SnapLogic Groundplex in EU Cloud
Resource configuration in production: DS3_v2 (2 vCPU, 16GB RAM).
Deploy SnapLogic Groundplex
-
Create Service connection (SPN) to access the resources from Azure.
-
Ensure that the SnapLogic docker image is available in the kmdworkzone ACR (kmdworkzone..azurecr.io/snaplogic/snaplex:latest).
-
Add the image pull secret to the environment configuration.