Publishing the WorkZone Mobile (New) for Android on Microsoft Intune (Azure Portal)
Prerequisite:
- Internal domain users are synced to Entra ID and user groups with access to WorkZone Mobile (New) exist.
- Conditional access policies are created. See Set up security and access from mobile devices.
- Intune is set up so that mobile devices are managed and the devices are marked as "in compliance" by Intune.
- Managed Google Play account must be synchronized:
Log in to the Microsoft Azure portal.
Add Microsoft Authenticator, Intune Managed Browser, and the Microsoft Office apps
Optionally, you can add the Microsoft Authenticator app, the Intune Managed Browser app, and a number of Microsoft Office apps to improve user experience with the WorkZone Mobile (New).
- Go to Microsoft Intune.
- Click Apps > Platforms > Android.
- Click Create. In the App type field, select Store app > Managed Google Play.
- Click Select in the menu.
- Type Microsoft Authenticator into the search field and select Microsoft Authenticator from the available options.
- Click Select.
- Type Microsoft Edge into the search field and select the application.
- Click Select.
- Type Microsoft into the search field and select the applications that you want to add.
- Click Select.
- Click Sync.
- From the app list, select individual application, and click Properties under Manage.
- Under Assignments, click Edit.
- Under Required, click Add Group.
- Type EMS_Licensed_Users into the search field, and click Select.
- Click Review + save.
- Click Save.
Add the WorkZone Mobile (New) app
- Go to Microsoft Intune.
- Click Apps > Platforms > Android.
- Click Create. In the App type field, select Store app > Managed Google Play.
- Click Select.
- Type WorkZone into the search field and select WorkZone published by KMD A/S.
- Click Select.
- Click Sync.
- From the app list, select WorkZone Mobile, and click Properties under Manage.
- Under Assignments, click Edit.
- Under Required, click Add Group.
- Type EMS_Licensed_Users into the search field, and click Select.
- Click Review + save.
- Click Save.
For more information, see Microsoft articles:
- Add Managed Google Play apps to Android Enterprise devices with Intune
- Assign apps to groups with Microsoft Intune
Create an app configuration policy
WorkZone Mobile (New) supports pushing certain connection settings to the mobile devices through Intune. This is done by creating an app configuration policy and assigning the policy to the app users.
- In Intune, click Apps > Managed Apps > Configuration.
- Click Create > Managed devices, and fill in the required information (see example below).
- In the Targeted app, select WorkZone.
- Click OK.
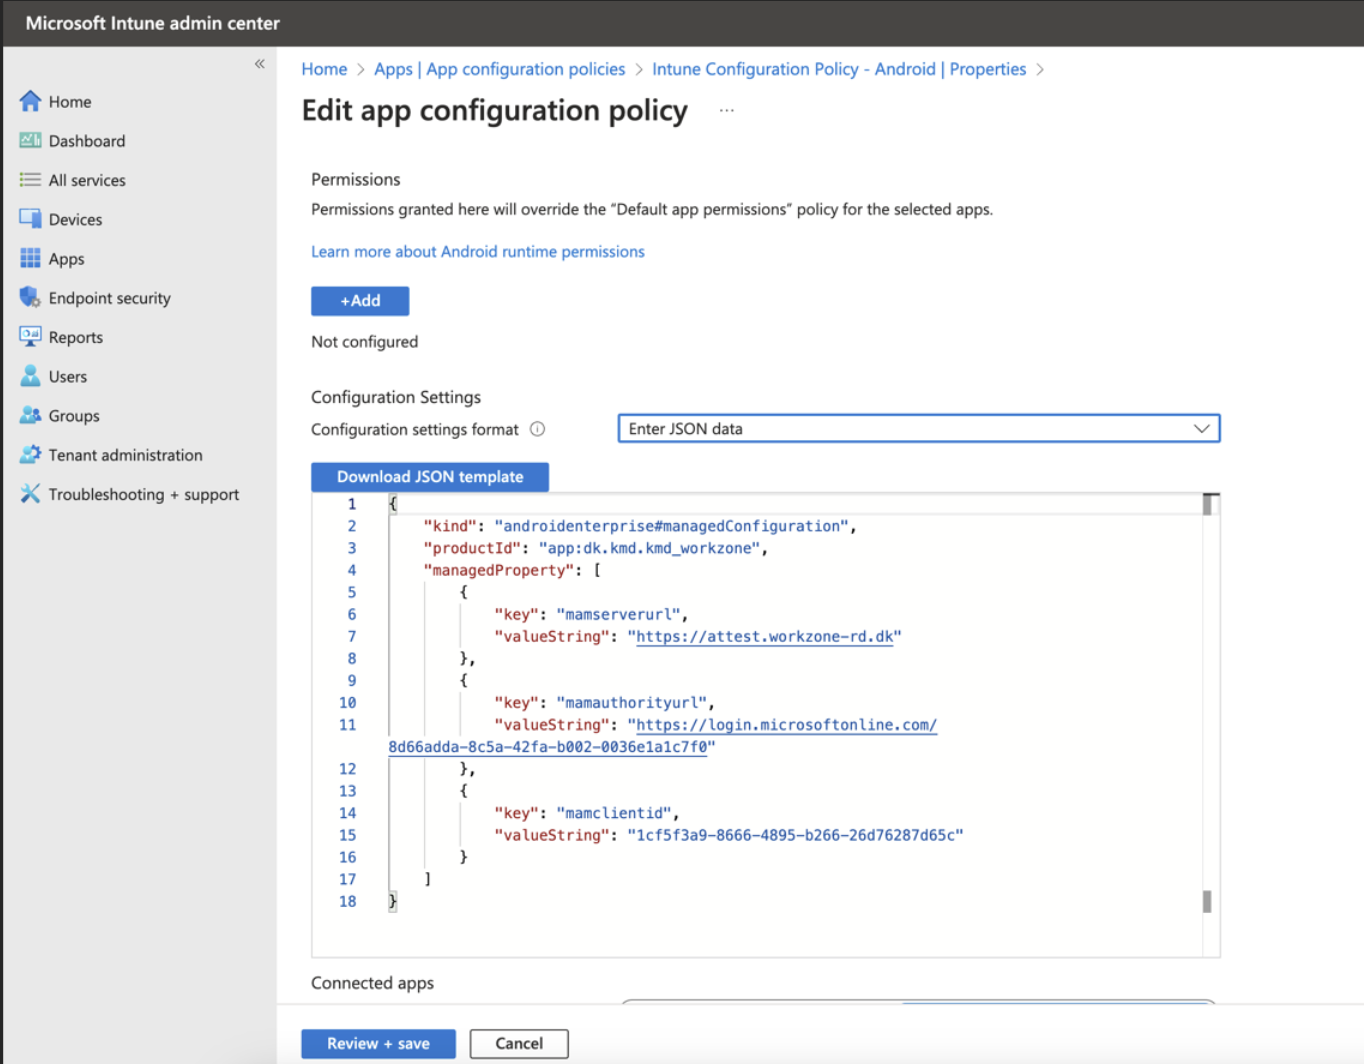
- Click Configuration settings and select Enter JSON data in the Configuration settings format list. Adjust your data.
{
"kind": "androidenterprise#managedConfiguration",
"productId": "app:dk.kmd.kmd_workzone",
"managedProperty": [
{
"key": "mamserverurl",
"valueString": "[URL to your WorkZone server]"
},
{
"key": "mamauthorityurl",
"valueString": "[Authority URL to your WorkZone server]"
},
{
"key": "mamclientid",
"valueString": "[ClientID]"
},
{
"key": "mamuserprincipalname",
"valueString": "{{userprincipalname}}"
}
]
}
Tip:
You can find the ClientID based on the Azure Configuration (Single app registration or Enterprise application registration) in your environment:
- Single app registration: Under Azure Active Directory > App registrations > [Name of your WorkZone Mobile (New) app] where it is called Application (client) ID.
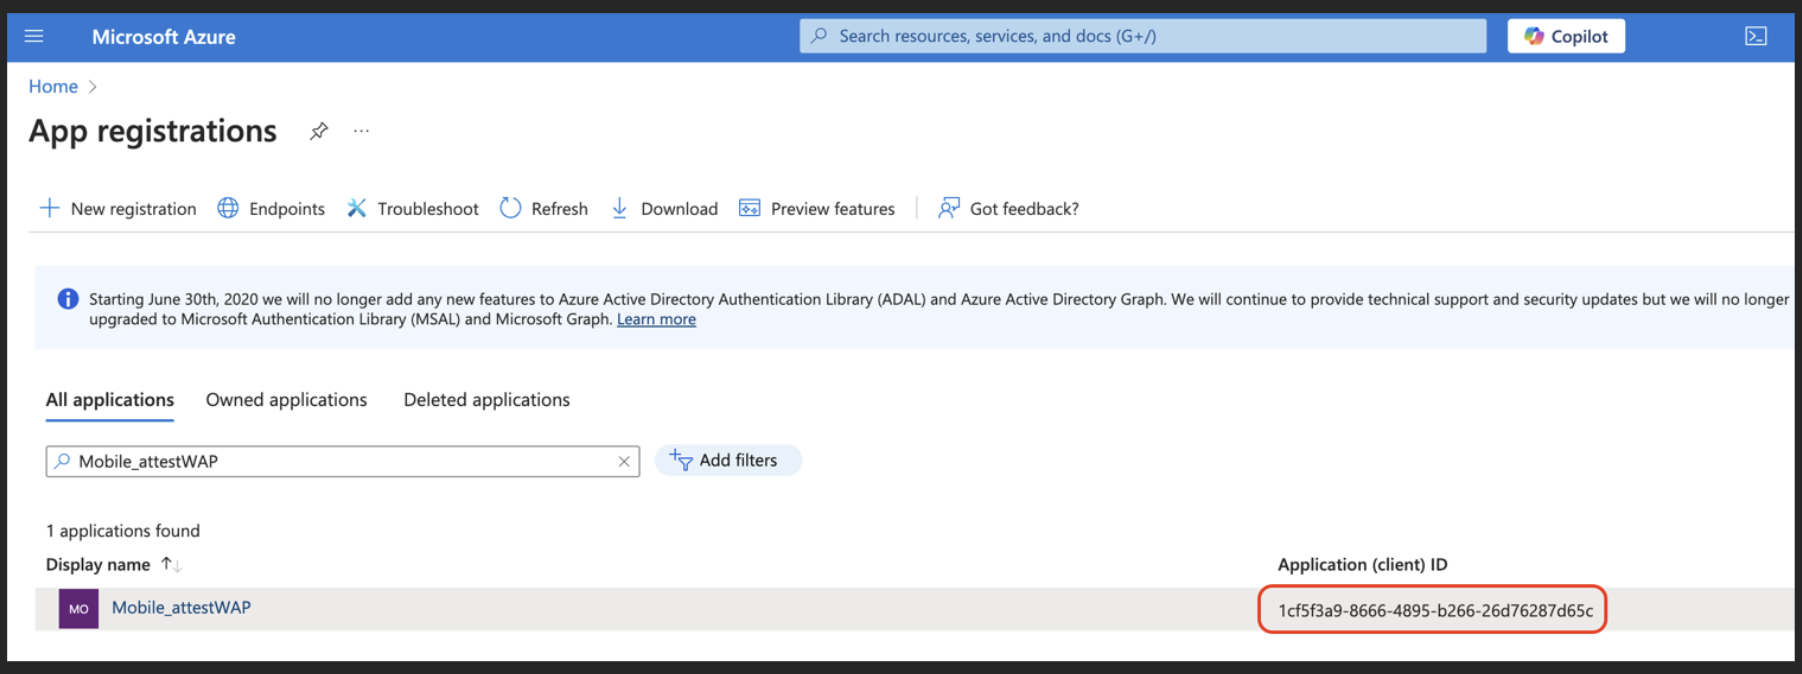
For the detailed steps, see Microsoft article Register an application with the Microsoft identity platform.
- Enterprise application registration: Under Azure Active Directory > Enterprise applications > [Name of your WorkZone Mobile (New) app] where it is called Application (client) ID.
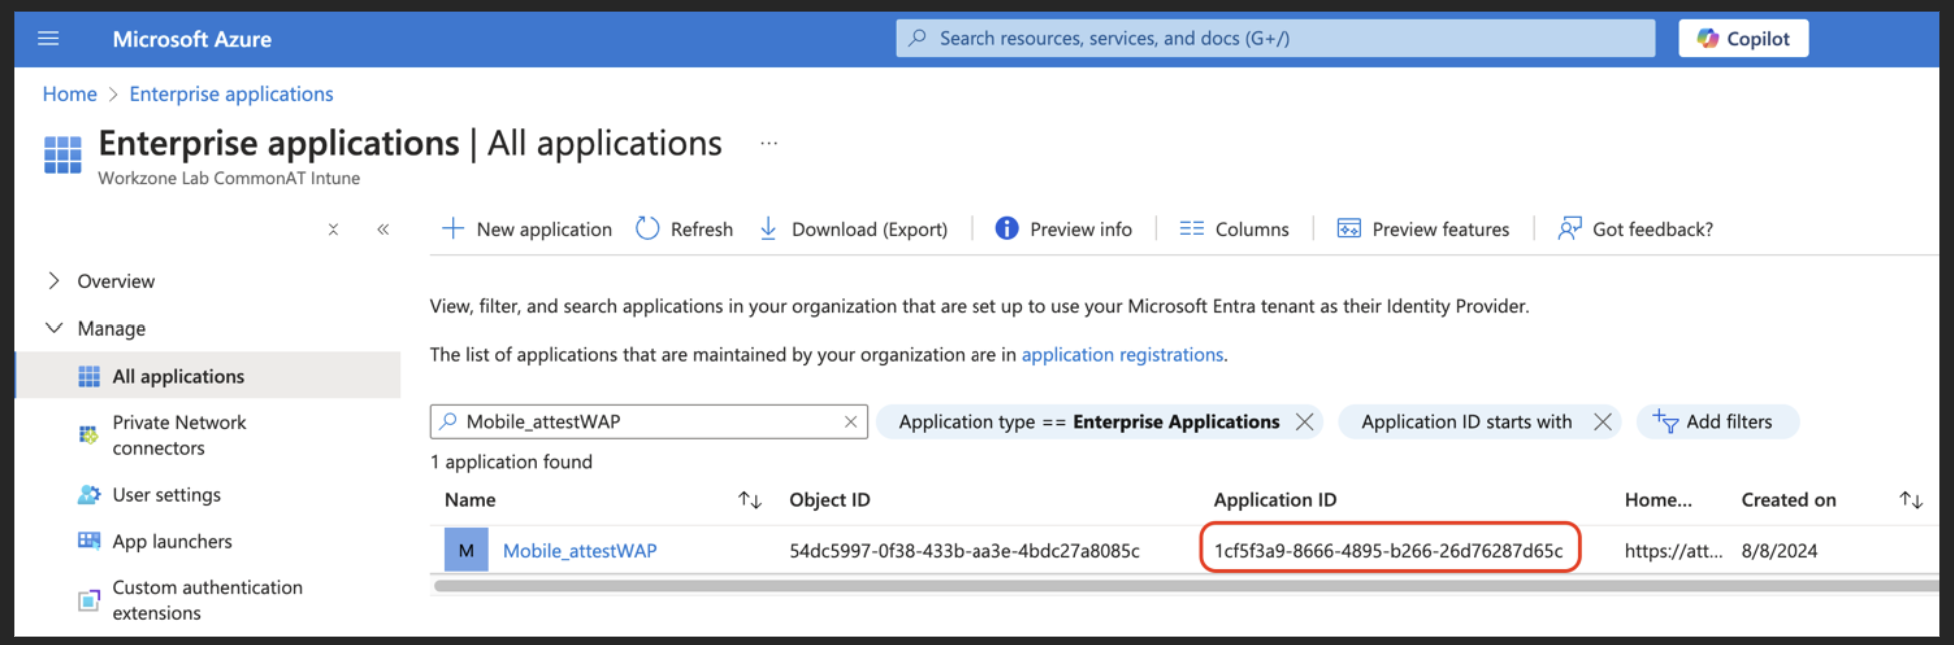
For the detailed steps, see Microsoft article Add an enterprise application.
- Click Review + save.
- Click Save.
- Under Assignments, click Edit.
- Under Required, click Add Group.
- Type EMS_Licensed_Users into the search field, and click Select.
- Click Review + save.
- Click Save.