Notes
You can create notes on cases, contacts, and documents in order to record case management progress and to share it with your colleagues. You can quickly view, create, edit, lock, and delete notes on the selected case, contact, or document. Notes are protected by the access codes defined on a case, contact, or document on which the note has been created.
Note: You cannot add notes to the contacts that have the Unit type.
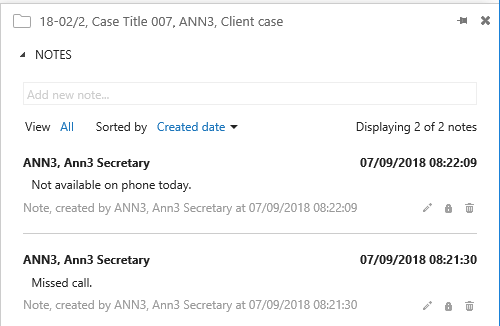
You view, edit, lock, and delete notes from the NOTES panel. The NOTES panel displays all notes on the selected case, contact, or document and provides additional information on each note, for example:
- Who created the note and when it was created.
- Who updated the note and when it was updated.
- Note type.
- Note text. For a better overview, text exceeding 200 characters is partially hidden. You can click More or Less to expand or hide the full note text.
Tip: For easy access to the NOTES panel, you can pin it to the detail page and unpin it later. Click  to pin the NOTES panel, and click
  to unpin it.
View all notes on a case, contact, or document
You can view all notes created on a case, contact, or document.
- Open a case, contact, or document for which you want to view notes.
- In the ribbon, click Notes
 to open the NOTES panel.
- You can see if there are notes on the selected case, document, or contact without opening the NOTES panel. The counter on the Notes button displays the total number of notes on the selected item.
- By default, all notes on the selected case, contact, or document are displayed, but you can select to view only the notes of a specific note type. On the NOTES panel next to View, click All and then select the note type that you want to be displayed.
- By default, all displayed notes are sorted by Created date. To sort them differently, on the NOTES panel next to Sorted by, click Created date and then select another sorting option:
- Created date
- Updated date
- Created by
- Updated by
- Note type
- If there are many notes on the selected case, contact, or document, you can scroll between the displayed notes.
Note: Available note types are configured in WorkZone Configuration Management. See Developer's Guide for WorkZone Client for details.
- Open a case, a contact, or a document on which you want to create a note.
- In the ribbon, click Notes to open the NOTES panel.
- Click the Add new note field to open the Note text field.
- In the Note text field, enter the note text.
- Optionally, change the note type.
- Click Add note. A new note is created.
You can edit your own or a colleague’s notes.
Prerequisite: You can only edit a non-locked note.
- In the NOTES panel, open a note that you want to edit.
- Click
 . The Edit note dialog box opens and the Note text field is active.
 - Make your changes.
- Click Save.
You can lock your own or a colleague's notes. When the note is locked, it cannot be edited or deleted.
- In the NOTES panel, open a note that you want to lock.
- Click Lock
 . The Confirm dialog box opens.
 - Click Yes.
You can print the case notes to a PDF file and save it on a case and on your local disk.
Prerequisite: To create a PDF file, the WorkZone PDF Engine must be installed.
- Open the case detail page.
-
In the ribbon, click
 Print > Print notes.
 - Select the notes that you want to include in a PDF file from the left-hand list. For more specific search, select a note type from the drop-down list or expand Advanced search to apply your criteria.
- Click
 to move the selected notes to the right-hand list. Only notes from the right-hand list will be included in the PDF file. Drag and drop notes to place them in the order that you want them to appear in the PDF file.
 - Click the Advanced tab and adjust settings for the PDF file:
- Template – Select a template for a PDF file.
- A case with notes – Includes meta data of the case and selected notes.
- Click Print and save to create a PDF file that will be saved on the case, or click Print to save it on your local disk.
You can also edit title, document type, document group, case handler, letter date, document state, and classification for the PDF file.
You can delete your own or a colleague's notes.
Prerequisite: You can delete a non-locked note only.
- In the NOTES panel, open a note that you want to delete.
- Click Delete
 . The Confirm dialog box opens.
 - Click Yes.