Configure allowed documents
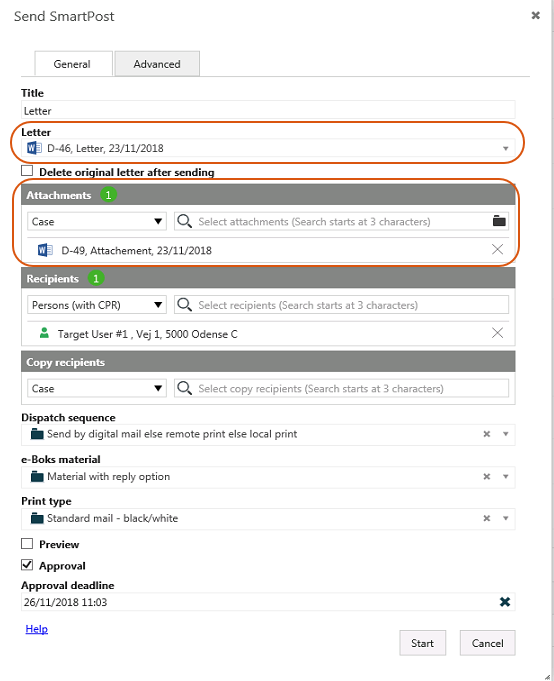
You can configure which documents that users are allowed to select in the Send SmartPost dialog box based on a custom field and its values. If you have configured allowed documents, users will only be able to select the documents with the allowed values from the droplists in the Letter and the Attachments fields in the Send SmartPost dialog box.
Example:
An organization has marked their documents with different levels depending on the confidentiality of the documents. For this purpose, they have created a custom field named Document level that contains a droplist with the values 1, 2, 3, 4, and Not specified. The Document level field has been added to the document detail page in WorkZone Client. The employees are only allowed to send documents with level 4 and Not specified using SmartPost, which means that only documents with these levels are shown in the droplists for the Letter and Attachments fields in the Send SmartPost dialog box.
You configure which documents are allowed by configuring the ValidationProperty and the ValidationValues parameters in the SmartPost process parameters. In the above example, the ValidationProperty parameter must be set to the custom field Document level and the ValidationValues parameter must be set to the values 4 and Not specified.
Configure allowed documents
Prerequisites:
- A custom field of the type Droplist. The Droplist type allows you to add multiple values.
- A custom droplist that contains values for the documents.
- The custom field is added to the document detail page in WorkZone Client.
See Custom fields in the WorkZone Configurator Administrator Guide.
See Custom droplists in the WorkZone Configurator Administrator Guide.
See Configure detail pages in the WorkZone Client Administrator Guide.
- In WorkZone Configurator, click Process.
- Click Processes.
- Point to the SmartPost process. A menu bar appears.
- In the Edit process parameters dialog box, select the custom field that you want to validate against in the ValidationProperty parameter.
- Select allowed values in the ValidationValues parameter.
When the setup is complete, the users will only see the allowed documents when they click in the Letter and Attachments fields in the Send SmartPost dialog box.
If the custom field is empty, the document will be considered as allowed.