Start an advanced submission
The advanced submission process is part of the extended package. It allows you to combine sequential and parallel process steps in one submission process.
If you, for example, would like some colleagues to review and approve a document that you have written. Your colleagues can comment and edit the document in no particular order but they must have reviewed and approved the document by a certain deadline. When the review is completed, you want to submit the document for final approval by management, which in this example, is represented by two managers who must approve the document in turn. The entire review and approval process has an overall deadline.
In this example, you can create and start an advanced submission process with two steps:
-
A parallel process step where your colleagues can review and make changes to the document, and approve the document independently of each other.
-
A sequential process step where the document is sent for approval by management. When the first manager has approved the document, the document is sent for final approval by the next manager.
The procedure below describes how you create an advanced submission. The review and approval scenario described above will be used as an example.
You can start an advanced submission from an email, the Cases & Documents folder in Outlook, or from WorkZone Client. For more information, see Start a new process and Process flows.
Start an advanced submission
- Open a case, for example in WorkZone Client or from the Cases & Documents pane in Outlook.
- Click Process on the ribbon. If you are starting the process from your Outlook inbox, and the email has been saved on multiple cases, then select a case from the list of cases.
- Click Submission (Advanced).
- Select a template in the Process template field. Depending on how the template is defined, you may want to use it as it is, or you can make adjustments before you start the process. If your organization has not made templates available for you, or you want to define a process from scratch, you can define a process yourself by following the steps below.
For information about templates and how to create them, see Templates for advanced submissions in the WorkZone Client User Guide.
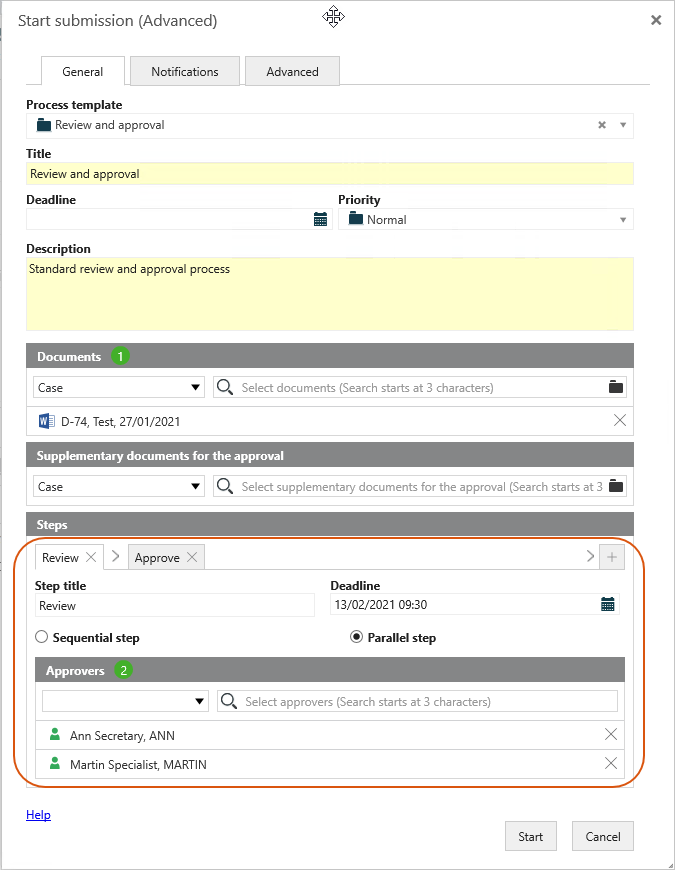
- Fill in basic information about the process using the following fields:
- Title The case title is inserted automatically. You can change the title.
- DeadlineSelect a deadline for the entire process.
- PrioritySet the priority of the process to, for example, High, Normal, or Low. Normal is the default value.
- Description Enter a description of the entire submission process.
- Documents Select one or more documents that you want to include in the submission. Click in the field, and select one or more documents from the list, for example, a case document, or select a document from File Explorer.
- Suplementary documents Select one or more documents from the list. The Supplementary documents for approval field may include approved documents from the last closed extended distribution process on the same case. If this is the case, you will see a message that tells you from which extended distribution process the documents have been imported.
- In the Steps section, you can add and define the steps of the process. For each step, you can specify:
- A step title. Instead of using the default Step 1 title, you can give the step a more descriptive title in the Step title field.
- A deadline for the step in the Deadline field.
- Whether it is a sequential or parallel step.
- Approvers. Click in the Approvers field and select from the list of contacts. The contacts can be employees or an actor sequence - see Work with actor sequences.
In this example, the first step is named Review and it is a parallel step.
-
Click + to add another step to the process, and fill in information about the step as described in step 10. In this example, the second step is named Approval and is a sequential step.

-
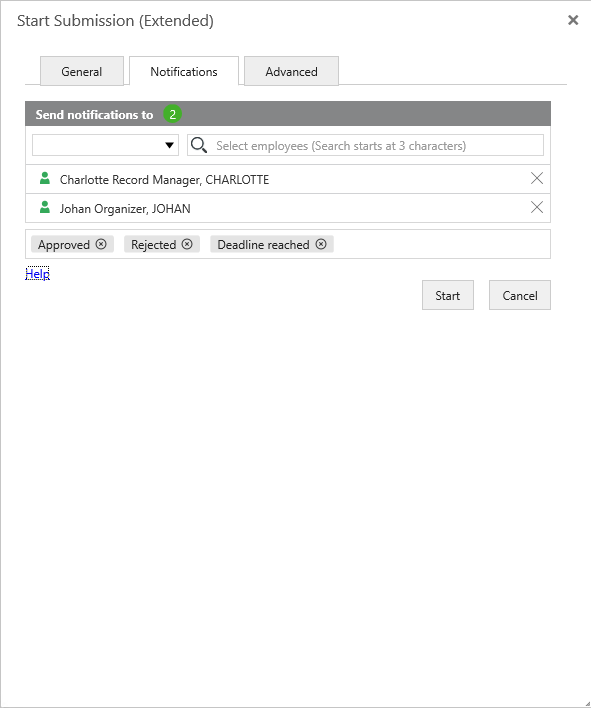
Optionally, select who you want to notify about this submission on the Notifications tab.
-
Optionally, select more options on the Advanced options tab.
- Click Start.
The process is started and is now visible in the Processes overview - see About the Processes Overview.
On the Notifications tab, you can select employees that you want to be notified by email when specific actions are performed. Select which actions you want to notify about and who you want to send notification emails to. The Notifications tab is the same for extended and advanced submission processes.
The employees that you select here are typically not actors in the submission process. They are employees that you want to inform about the actions in the submission process. Actors receive notifications automatically. See About notifications.
Optionally, fill in the fields on the Advanced tab.
The Advanced tab is the same for extended and advanced submission processes.
| Closing responsible | Select an actor from the list, if you want another user to close the process when all actors have responded. If you do not fill in this field, you will as the process owner be responsible for closing the process. |
| Entry case state | Select the state your process should start in, for example, New. |
| Exit case state | Select the state your process should end in, for example, Clarified. |
Select or deselect the following options. All options are selected by default.
| Save process history on case | Select this check box if you want to save the process history on the case. |
| Notify approving actors on rejected |
Select this check box if you want to notify the approvers if the submission is rejected. Only actors who have already responded to the process will be notified. |
| Notify actors when approved | Select this check box if you want to notify the approvers when the submission is approved by all. Only actors who have already responded to the process will be notified. |
