Optional configurations in WorkZone Client
If you have configured a Mailbox Monitor service workflow to monitor multiple mailboxes, you can do additional configuration in WorkZone Client to make it easier for users to work with the incoming documents that the service workflow creates. The configurations may be relevant, if you have configured a default combined case using the DefaultCase parameter as opposed to creating new cases for all incoming emails.
Create a custom field to display the monitored mailbox on the document detail page
You can, for example, add a custom field on the document detail page that displays the name of the mailbox that the email was sent to. Such a field will also allow the user to select another mailbox if, for some reason, the email was sent to the wrong mailbox.
Create a custom field of the type droplist
- Open WorkZone Configurator
- Go to Document > Custom fields.
- Create a new field of the type Droplist, for example Monitored mailbox.
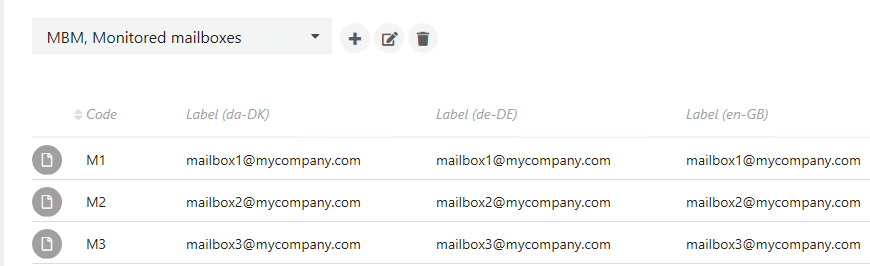
- Go to Global > Custom droplists.
- Create a new droplist, for example Monitored mailboxes.
- Add the mailbox addresses of the mailboxes you monitor as items on the droplist. Enter the mailbox address in the Label field and a code in the Code field.
See Custom fields and Custom droplist in the WorkZone Configurator.
Display the custom field on the document detail page
- In WorkZone Client, create a new configuration or edit an existing configuration. See Working with configurations in the WorkZone Client Administrator Guide.
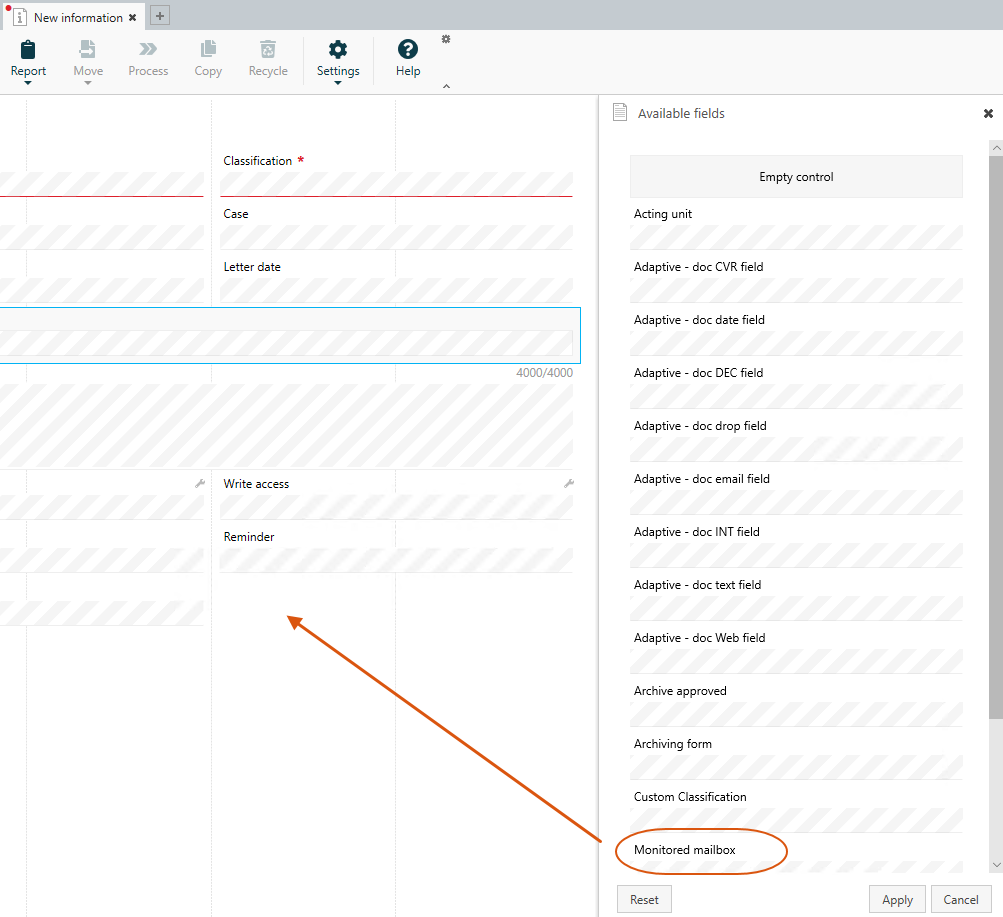
- Click Document > Information in the main ribbon.
- Click
 Configure page at the top right-hand corner to open the Available fields pane. Add the custom field to the document detail page.
 - Distribute the configuration to your organization. See Distribute a configuration in the WorkZone Client Administrator Guide.
- Exit distribution mode.
See Configure a detail page in the WorkZone Client Administrator Guide.
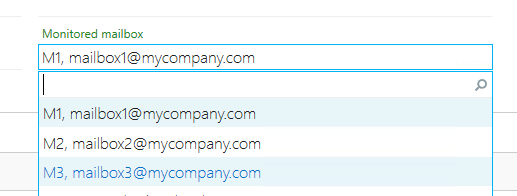
Users can now see the mailbox and select another mailbox on the document detail page.
Create saved searches to show incoming documents per mailbox
You can create saved searches that show incoming documents created by Mailbox Monitor per mailbox and, for example, you can display the saved searches on the dashboard in WorkZone Client for easy access.
Create a saved search per mailbox using WorkZone QueryBuilder
- Open WorkZone QueryBuilder.
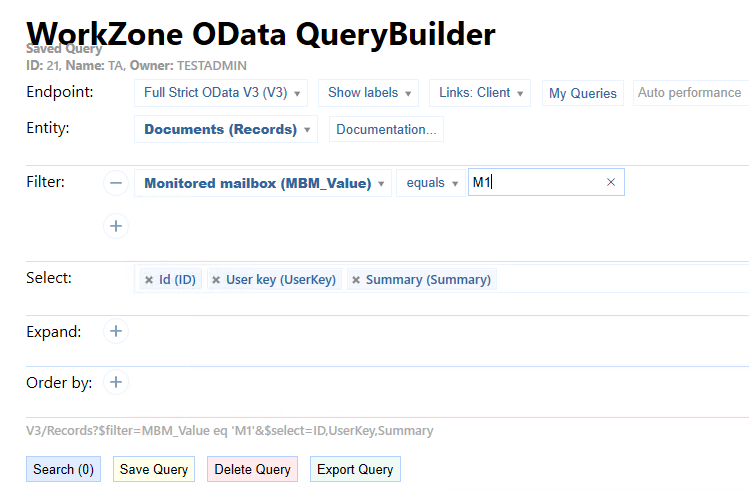
- Select Documents(Records) in the Entity field.
- Filter on the mailbox using the custom field code that you just created, in this example filter on the code M1 using the Monitored mailbox field.
- Click Save Query. The saved search now appears in the navigation pane under OTHER > My lists.
- Repeat the steps 1-4 for each of the mailboxes that are monitored.

You can now share the saved search list with the relevant users. See Share a saved search list in the WorkZone Client User Guide.
If you want to check that all monitored mailboxes are shown in the droplist in WorkZone Client, you can create a saved search where the filter of the custom field is is empty. This is useful if you add mailboxes to service workflows, and want to make sure that you have not forgotten to add them as items on the droplist. For example: ![]()