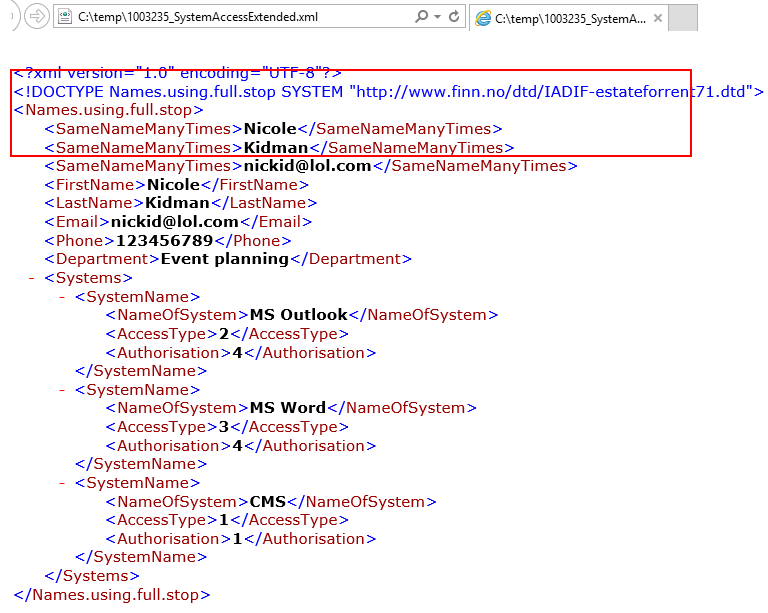
To create the structure, you click on the menu item File definition in the right-hand menu on the overview screen and click on New. You need to set a name for the file definition. This opens the following screen:
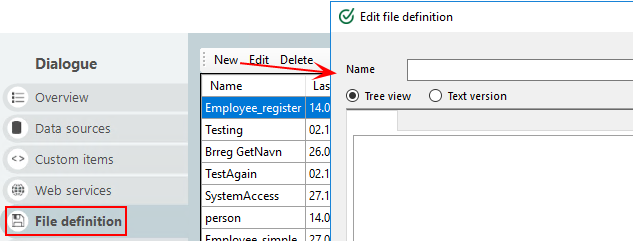
In the screen above, you can see a display (tree view) and a text editor.
Generation of XML
You use a simplified Script language to define the fields. There can only be one class definition in the root, and the other classes are defined in the root class. We will show an example. Currently, only three data types are available:
- "int" - is used when you need to enter a value that is a number
- "string" - is used for all types of values
- "array" - is a variable that can contain several values, e.g. if you need to add data that is retrieved from a repeating group where you do not know the total number, then you use an array to receive this data.
Validation is not available and must be defined in the dialogue. If a phone number needs to defined (int with 8 digits), this should be done in the dialogue by using the field type Phone or max. 8 characters.
In the example below, we will create a file definition where you will register a new employee who will have access to x number of systems.
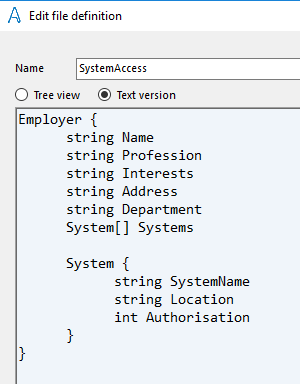
Start by adding class definition in the root (Employee). You need not write Class Employee, only the class name.
Then you define the fields in the class with:
- "string": Name, Profession, Interests, Address, Department
- "int": could be for example Phone
Next, define the “array” type class called System with its related fields.
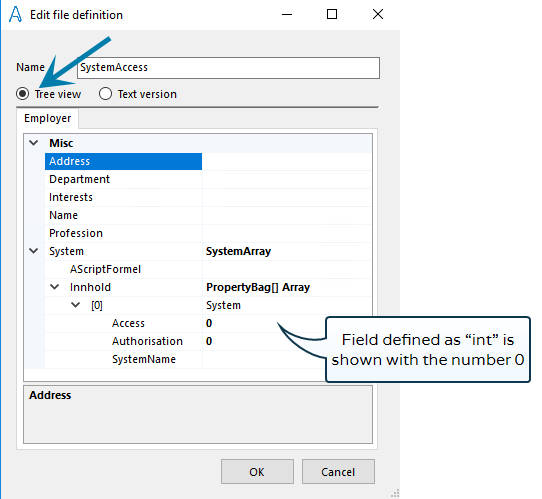
By clicking on Tree view you will be able to see the structure. It is possible to add pre-defined values directly in the tree structure, but it is more common to map in values from dialogues. Then you use file definition together with the delivery type Custom File.
Use of @ in file definition
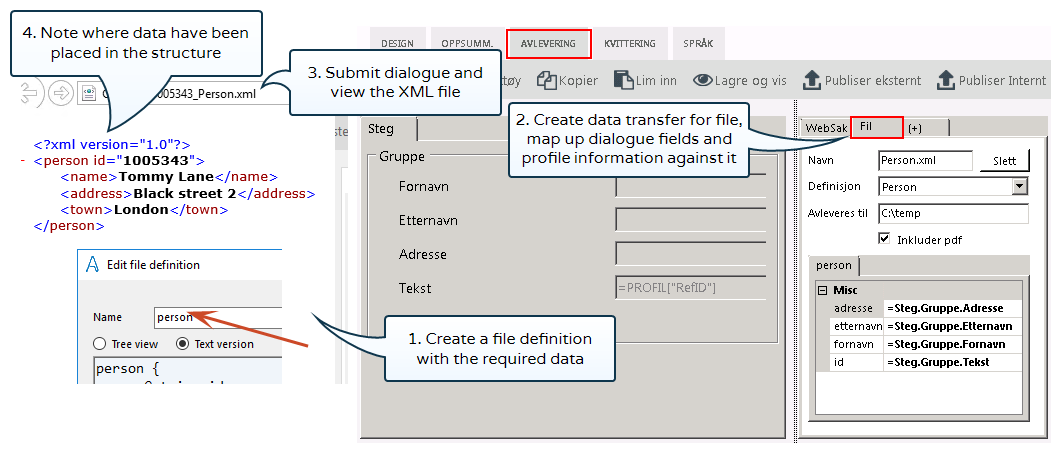
When you create a file definition, you can use @ in front of string, int and array. In the example below, the information you map to this will then be added to XML as an attribute (id), and not as an element (first name, last name and address).
Use of @element and @doctype in file definition
Spaces and periods are added in tag names, with no hyphens around, and duplicate tags, dynamically generated from arrays. This syntax is necessary for XML integration against Finn.no's API.
File definition now supports "decorating" properties with @element and / or @doctype.
@element will change a list in file definition in XML result from
<name>
<string>text1</string>
<string>text2</string>
</name>
to:
<navn>text</navn>
<navn>text2</navn>
@doctype will add <! DOCTYPE>, as the second line in the XML file (under the <xml> tag). Two values are added. The first is the name you start with in the file definition, and the second is the .dtd address (see "NameInTopOfXML").
The fields can be used for fixed values or for mapping of values in the custom file dispatch tab.
Example of file definition with @doctype and @element

On the form dispatch tab, you link File definition to the Custom file dispatch type:

To map data to tags with the same name (as shown in the image above), you must first create the number of tags to deliver. Click in fields connected to @element in file definition, then the three-dot icon:

In the window that opens, enter fixed values and create fields for mapping by typing = "text".
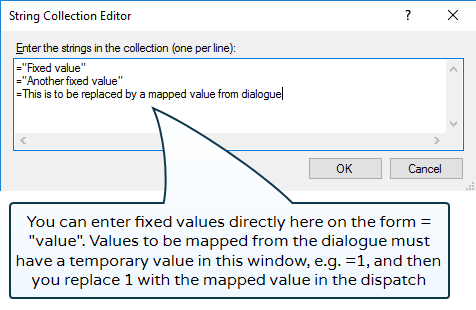
After tags have been created, you usually enter data from form by removing "text" and Ctrl + clicking on fields you want to insert. The delivered file shows as follows:
