How to configure dispatch to file and map dialogue field to object structure:
- Click Dispatch at the top of the dialogue
- Click on the (+) tab.
- Select Custom file. Click OK.

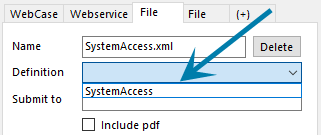
Enter file name of the dispatch (includes file extension, e.g. .xml or .json) and select the file definition to be used.. In our example, we have made a definition called «SystemAccess»

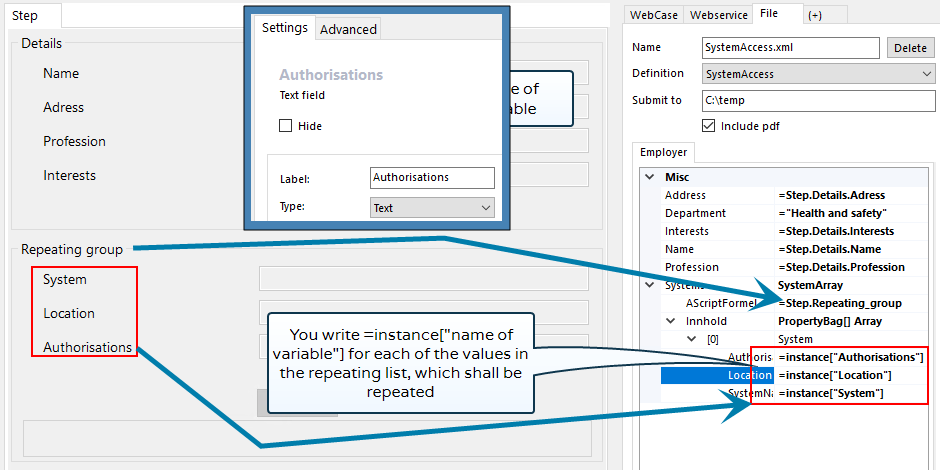
Then select the file area the submission is to be saved to or enter «submission +» if the file is to be submitted to Azure Blob Storage in the cloud. Local file path can be either a local folder structure or a network drive. The structure is presented below, and is named «Employer» in our example, which is the same as the class we defined at root level.

To map the dialogue fields, you must apply the same principle as for data transfer to web service or archive system. Click inside the dispatch field, type «=», hold Ctrl down and click on the relevant field in dialogue. In the example, I have done so for all fields.

Note that you cannot map a dialogue field in repeating groups in the normal way. Instead, you first have to map the group and then enter =instance[”variabelnavn”] for each field in the group you want to transfer. Note! Mapping a multi-element does not work.
The following picture illustrates what the electronic dialogue looks like when it is published. The listing of systems are shown at the bottom.

A submitted XML-file will look as follows, and in our case the array Systems is repeated twice:
